torsdag 26 januari 2017

Battery box and International press.

I haven´t been doing that much on the bike the last two weeks. Work has started again and I´m waiting for parts. The stanchions, ordered from Germany, hasn´t shown up yet. What did show up yesterday were these babies....

Reproduced battery boxes.
I believe I mentioned earlier I borrowed Janne´s original battery box to get it copied. Well, I did! Not me personally, but my very good friend Tommy at Proswede in hoerby. He is not only a businessman with his own mechanical workshop but also a true motorcycle enthusiast. He has restored a number of bikes over the years and I have seen his "mueseum" and been very impressed with his workmanship. He has a couple of H2:s, Z1:s and many more bikes. All in superb condition.

The story with my battery box started when I was down in Malmoe before Christmas and picked up the engine from Ebbe. I also visited Tommy and Proswede to pick up a few other parts that he had treated. While standing there discussing this and that I saw a couple of guys bending sheet metal in a machine...

- " Wow!, can you make stuff in sheet metal?" I asked.

- " Sure. What do you need? We have it all here. Welding machines, waterjet machine bending machines. We can do what ever you need!" He replied.

I got home and sent Janne´s battery box down to Hoerby together with the oil tank bracket. The battery boxes arrived yesterday. I couldn´t be more happy!

One of Tommy´s employee´s had been working while Tommy was on vacation and ,as he said, "done his best..." I think he did a remarkable job! I asked Tommy for 5 copies and he made 6. You can see the original one to the left in the above picture. Apart from the finish in painting it is almost impossible to tell them apart. Such great precision and workmanship shown from Göran.

Comparison original and copy.

You can see the spot welds are placed exactly according to the original. All measurements are exactly correct. Only the finish in paint differs. You probably will want to paint the box together with the frame anyway.

Rear side of boxes.
Every detail, diameter of the holes, the number of spot welds, brackets etc, etc line up perfectly. It is remarkable what you can do with a water jet machine, welding equipment and some talent.

The bottom side of the box.

The mounting of this battery box to the frame is actually a small mystery. The box have no brackets to hang it onto frame, just the small holed bracket on the bottom and the rubber holder brackets. Here´s what it looks like on the bike.

3rd of May 1970 at Anderstorp.
It is kind of interesting to see just how simple everything seems to be. The battery "hangs" in its rubber straps below the frame tube and is "pulled" down with a spring mounted between the frame and the battery box. The spring is actually the same part number used to hold the expansion chambers to the exhaust port. Clever.

You can also see that this arrangement wasn´t optimal. At this, his first race ever with the bike, "Esso" had to put a rubber tube and some seat foam as extra protection between the battery and the frame. He has also tied some kind of rubber from the battery box to the rear frame tube. Probably in order to stabilize the battery better. The battery went hose is clearly visible here going rear and out over the swing arm. The small fuse box can be seen below the rubber straps. I found a couple of those in the US and they´re on their way home now.

Interesting is also to see that there was no rubber parts on the frame to support the tank! The frame still has this these rather simple, home made, "dampers" in place. I wonder if they still are the originals....?

The number of the battery also tells a story... 12N 5,5 4A. That is the same battery used on the later H2:s. The street version of the H1 used a slightly larger battery with a bigger capacity. Since I´ve been collecting stuff for H2:s a while I had a couple of NOS batteries in stock. I´m not sure Kawasaki used Furukawa batteries but these seem very appropriate to me. The 4A is the correct one according the above picture since the air vent hose passes out to the left as seen from the front of the battery. The only difference with my other battery, called 3B at the end, is the postition of the two poles and the side of the air vent hose. No big deal on this bike!

Old batteries...
As you can see these have never been used, still in their original boxes and has never kept acid. To be completely honest they never will... I´ll get another H2 battery when the time comes. These are perfect for display!

The rubber straps was another eBay find. I knew the part number. Searched for them for a while and finally found two in England at an OK price. I started to follow that particular part number and a couple of weeks later they showed up again. This time in the US, at Partzilla. Much cheaper, so I grabbed quite a few...

The result can be seen here. I´m now officially in the reproduction business of H1R parts! Soon the seat cover will be added to this new venue of mine.

Battery boxes in steel and carton.
I´ll end the story of the battery boxes with this picture of the rubbers, sheet metal parts and the battery cartons. This delivery for sure made my day!

Over to the next topic of the day. International Press.

Even though the restoration is far from finished it has been a wonderful journey. I´ve got to know many new friends all over the world doing similar restorations and a few building replicas both here in Europe and stateside. The "barn-find" also made front page here in Sweden through Classic Bike magazine.

Just after starting this blog i was approached from England with a request to do a piece in a magazine. Practical Sportbikes made a one-page article on the find and initial assembly plus photoshoot.

Practical Sportbikes.

It feels kind of funny seeing your own car-driving-selfie in an article. They must have liked my silly smile in that picture!

After the story was published in Classic Bike with Ola Österlings great pictures, there has been another couple of international articles done. One in the German magazine, Motorrad Classic, and one in the French, Moto revue Classic. The latest addition was actually the  Kawasaki triples club in England that featured the story.

Japanese bike big in Garmany and France.
The Germans found it interesting enough to put it on the front page! I´m sorry to say, but my German is as bad as my French, so looking at pictures will have to do for me. I will post the pages here for you guys who can read the articles. Motorrad Classic first.

Full spread article. 
I think they chose wisely with their first picture. I really love what Ola did here in the old car workshop. The atmosphere is perfect.

Spread number 2 Motorrad Classic.

we recognize the pictures but you can always arrange them differently and get another view on things.

Spread 3.
I guess the text here says: "The story of this H1R is traceable without gaps due to it being lost for such a long time"....?? Or something like that.

Spread 4.

The last pages of the German article is mostly text including "Esso" Gunnarsson´s bio and the story about the bike and the making of it.

The French magazine Moto Revue Classic did it in a similar way. Start off with a nice picture of the bike.

Moto Revue Classic.
"Sortie de Grange" means "Barn find".... We know what that is! I like the term "collectioneur" they use about me. Feels good to be known as a collector AND a Connoisseur! Maybe I should go into the French wine business as well.

Spread 2.
"In front of this pile of scrap metal, Per Olofsson, exclaims, it is going to be a pleasure" Well, that´s true, and it still is! I´m enjoying every bit of this project!

Last spread of  the Moto Revue article.
Here it is stated that the engineers had no choice but to put the engine very high up in the frame to be able to route the expansion chamber underneath it. That is (supposedly...) the  reason the road holding characteristics aren´t that good. They also look forward to me getting the bike finished so they can test that theory for themselves. Yeah, we´ll see ´bout that!

Moving on to the Kawasaki triple club. Thanks to Malcolm Anderson (editor) for letting me post these pictures!

;-))

KTC first page.


Page 2.


Page 3.

Page 4.

Page 5.

Page 6.
I´ll leave you with these pictures for now. Hopefully my next post will be about the front fork stanchions, revcounter bracket or maybe a small piece on one of "Esso´s" first competitions with the bike. I´m still trying to gather material and pictures for the racing history of the bike and the guys who drove it.

Thanks for reading!

/Per


torsdag 12 januari 2017

Parts, parts and even more parts.


When you are restoring an older vehicle the need for new, good used parts or even sad trashed parts is present all the time. Depending on the status of your project and your ambition for the final result the need for stuff can be very different. Some of us strive for that perfect concourse restoration with only perfect used or NOS parts to use on our projects. This tends to be very time consuming and costly to say the least. Unless you have a very large bank account and can order what ever you need at any given point in time this is a kind of renovation only very few people can afford. Most of us have to plan ahead, look for parts for longer periods of time and try to find them at an affordable price. Sometimes you have to wait a year or two to find that missing bit.

The alternative is to use what you have. Keep the parts that were on the bike or car and repair them as good as possible. I don´t value any method higher or better than the other. Each of us try the best to achieve what is possible within our own budget and knowledge. I have friends who can´t do much of anything when it comes to repairs or restoration works but still loves to do renovations! These guys have to trust mechanics, vendors, chromers, welders and painters etc to get things done. I am impressed with what they can achieve, and impressed with their ambition and stamina when it comes to spending money and time on their projects. One guy I know doesn´t even own a car... He put the frame of his bike in a taxi and took it to the media blaster! Now, that´s restoration ambition!

Well, now that my bike is in pieces, I have a whole lot of small stuff to go through. Nice! Here´s just a glance at my bench...

Parts, parts.....

As I have said before the hunt for parts for this bike is on more or less 24/7. I follow quite a few searches on eBay hunting for some hard-to-get-stuff and try to put ads out here and there. I´ve managed to land a few very good deals and some quite expensive ones. The thing is, when something shows up and you have the opportunity to buy it, it´s almost impossible to stay away. When will you ever find this part again if you opt out? Never, is the most probable answer....

I´ve found the rubber straps for the battery and for the oil tank, Some of the engine parts have been sourced by Ebbe and some by me through friends in the US, Britain, France and Switzerland. Janne have had the rubber mounts for the fairing reproduced and we found the rubber cap for the two stroke oil tank behind the seat plus foot peg rubbers etc, etc.

A while ago these babies showed up in Norway...

Such a great find!
Brand new in box, H1R-A.


Not cheap, but what can you do? Left hand cylinder and Center cylinder, NOS! Ok, they are for the H1R-A (the bridgeport intake tells...) but I couldn´t resist. I sold a bunch of other stuff. maximized my credit card and got them! Now it feels good. Specially since I already have a complete set of NOS pistons to go with them, Great find for the day it seizes up on the track...

I´ve been investigating a bit about the front fork inner tubes. I got a tip from a good friend that stanchions from a Yamaha model can be modified to fit the H1R. I measured mine very thoroughly and came to the conclusion that it actually can work! So, today I ordered a set from Germany. I hope I will get them within a week or so and then I´ll know more.

Measuring my tubes... Yeah, let´s get back to the bike!

Before I could measure them I had to take them apart. I figured they would function in about the same way as the street bike´s front forks. They do. Very much like the H2. The H1 has that "Ceriani" style front fork with bushings at the bottom and a chrome ring you screw on to the lower fork leg. These are Kayaba and look a lot more like the H2:s. So, the technique to take them apart should be the same. There´s the same Allen bolt in the bottom of the outer leg and the front fork top cap bolt at the top. Removing the top cap bolt (be careful with the spring tension..) gets everything loose inside. The spring, the spacer tube and the little special washer on top of the fork spring. Exactly the same as an H2! Nice.

Set up for dismantling.

Dismantling the fork leg is easiest using an impact driver. The Allen bolt is quite small and well hidden. Not too much torque on the driver....

As you can see below, there´s not that much stuff inside the fork legs. Very small and very light. There´s more parts in the street bikes damping systems, for sure.

Front fork parts ready for inspection.
These parts I will tend to later. Now I need to focus on the inner tubes. They sure do look bad. They need a rechrome or to be replaced. I have found a couple of businesses in England that can straighten (not needed her, I think), replate and even rebuild them. If anyone have information about Brooks suspension or Dynasurf, I´m all ears!

Pitting and rust....

Here´s what they look like on the surface where the lower legs will slide up and down... Not too good! I believe there´s a limit to how much hard chrome you can put on without loosing strength in the surface. I´m also trying to find someone here in Sweden that can help me. My best option for now is an hydraulic workshop that does mechanical work on hydraulic cylinders and also replates the chrome surfaces. Hydraulics is what these are about, more or less!

The top part of the tubes doesn´t look  much better! But these surfaces aren´t that sensitive in precision. I think they can be ground or even sanded.

Top part of tubes.

One interesting thing about the tubes is that the diameter is different at the top and lower triple trees. The diameter at the bottom triple tree and all the way down is 34 mm. from the lower tree and up the diameter is gradually reduced to 32 mm at the top. There´s no chrome here either! The top triple tree is 32 mm so it has to be original. To make the fork lighter? I have no idea!

I´m very excited about the Yamaha tubes I ordered today... Let´s hope they can be made to fit! That would be a small but nice victory!

I cleaned some of the small parts on the bench as well. First off was the throttle grip and the left hand rubber grip.

Cleaned and polished!

The left hand rubber grip seemed to be impossible to remove without destroying it. It was hard and seemed to be cracking when I tried to move it on the tube. I carefully heated it with my heat gun, treated it with some "Armour All" and slowly tried to pry it loos bit by bit. Finally I got it off, and in one piece. Now it is treated several times with rubber grease and "Armour All" and it looks great! I can still use it. That´s the way I like it...

The throttle grip was easier to handle and cleaned up super nice! The rubber was softer and the aluminium parts polished up just nice to that semi-gloss I´m looking for.

Here´s a picture that shows just how hand made these parts are:

Rare parts for a rare bike!

Look at that surface! Looks to be welded by hand and then zinked. Not too god finish at all, if you ask me.

Hand made and lightweight.

That throttle cable pulley is a lot thinner than anything I´ve seen before. As I said earlier. Business only, not looks.

Ready to be assembled.

The throttle grip finished. Let´s go for the front brake lever! That was an easy disassembly, cleaning and polishing job. Pure joy! Buffing aluminium is great fun. Quick and wonderful results. The hard part is stopping the process before it gets too shiny. I´m having difficulties here, but I´m learning...

There´s always an accident...
I was planning on replating that rusty adjustment piece, but I later changed my mind and just took the rust away, polished it a bit and put it back on... Enough is enough and I´m learning! The mounting screw snapped... I had to drill the last part out buy I got it!

And now on to something rather peculiar. Here´s the clutch perch. Situated on the left hand clip-on handle bar. Notice something strange?

Clutch perch...?
Well, I didn´t until I compared it with the brake perch.... It isn´t even a clutch perch!! Someone put a brake perch upside down on the left hand side of the handle bar and used it as a clutch perch. I never noticed this until now. In my defence I´d like to add that the actual lever has been broken all the time since I bought it. So? Do I use it with a brake lever mounted up side down? At least the last driver, Björn, used it this way in 1974. We´ll see about that. For now I polished it.

Next, and last, was the choke lever. I believe this is the correct one used on the bike from  the start.

Dirty choke lever.

There are choke levers that says "CHOKE" available on eBay, but I think this is the correct one for the H1R. I´m not 100% sure, but I know it will be used on this bike! Change as little as possible is the mantra here!

Levers and grips!

Not too bad for an evenings work! This is very rewarding and satisfying to do. Good music on the radio and the hours just pass away. Women talk about Yoga and meditation. They should try restoring old bikes!

The last picture today will be this one.

H1R tachometer.
I have  started searching for someone who can vulcanize the base for my tacho. I hope I found a venue close to Stockholm. I E-mailed him pictures today on the parts and we´ll talk tomorrow about the work. Let´s keep our fingers crossed!

Over and Out!

/Per


onsdag 11 januari 2017

Dismembering the Beast.

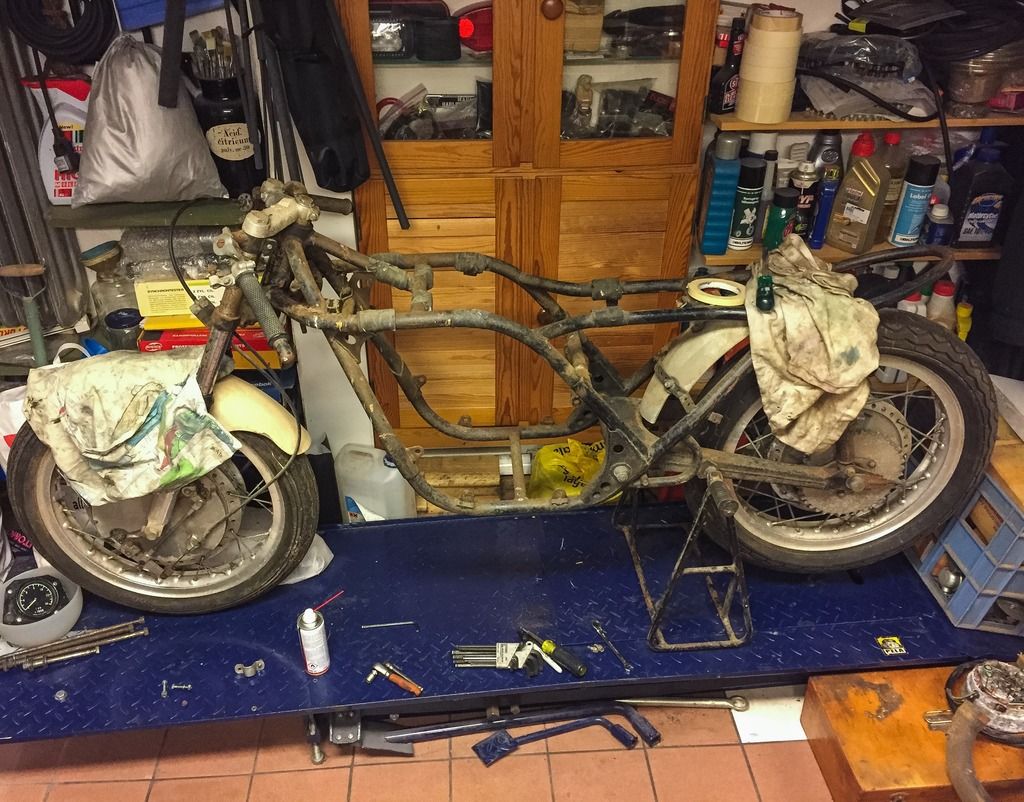
After dealing with the seat cover for a few days and tinkering with the last missions of the  bathroom restoration I´m ready to take the chassis apart. I need to find replacement front fork legs or restore the ones I have. A good sweep of the garage floor and a bit of organizing parts and boxes I finally got within reach of the bike, there on the lift. I started taking a whole lot of pictures on every detail, safety wirings, nuts, bolts and everything else you need to remember when putting it all back together again. Thankfully there´s not that many parts on a racer...

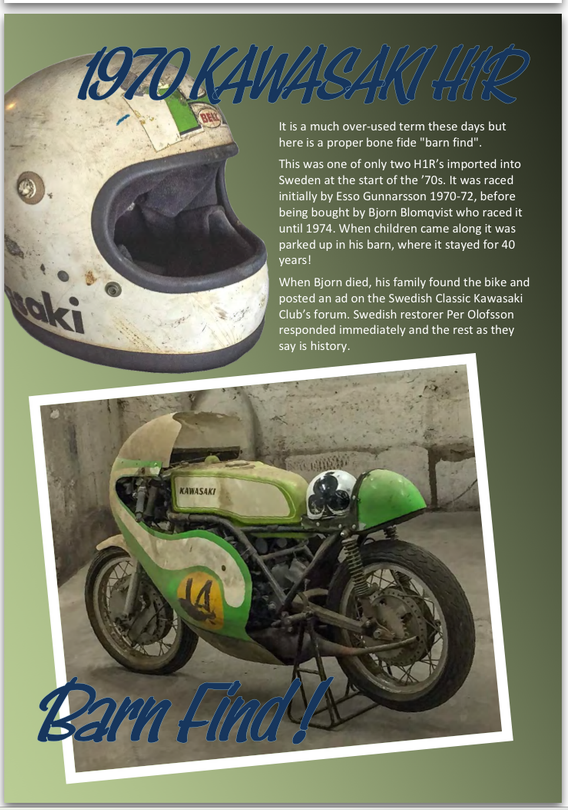
Here´s another example how most every bolt and nut is safety wired. Still some muck and dirt around even though I tried cleaning it with a vacuum and some compressed air. I decided not to use water and my Kärcher high pressure cleaner. It just didn´t feel right! I´ll have to clean all parts bit by bit in white spirit instead and use polish and wax... And that´s a fine sort of relaxation in the shop when you have some good music on and fettle with your parts.


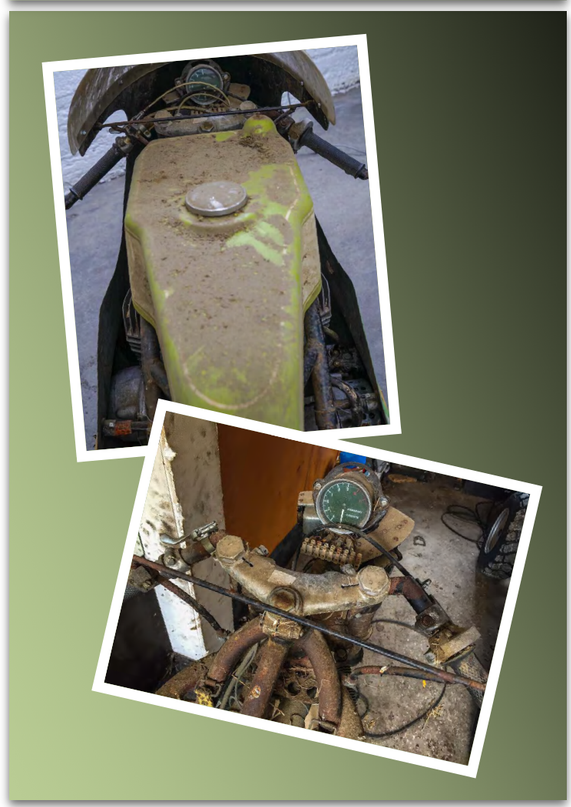
First off was the entire ignition system still strapped to the bike. It all came off easy and I put it all together in a box for later attention. This is the Kröber system (or parts of it...) the rest was disassembled from the engine at Ebbe´s shop last autumn. Those parts are also back home and waiting to be fixed!


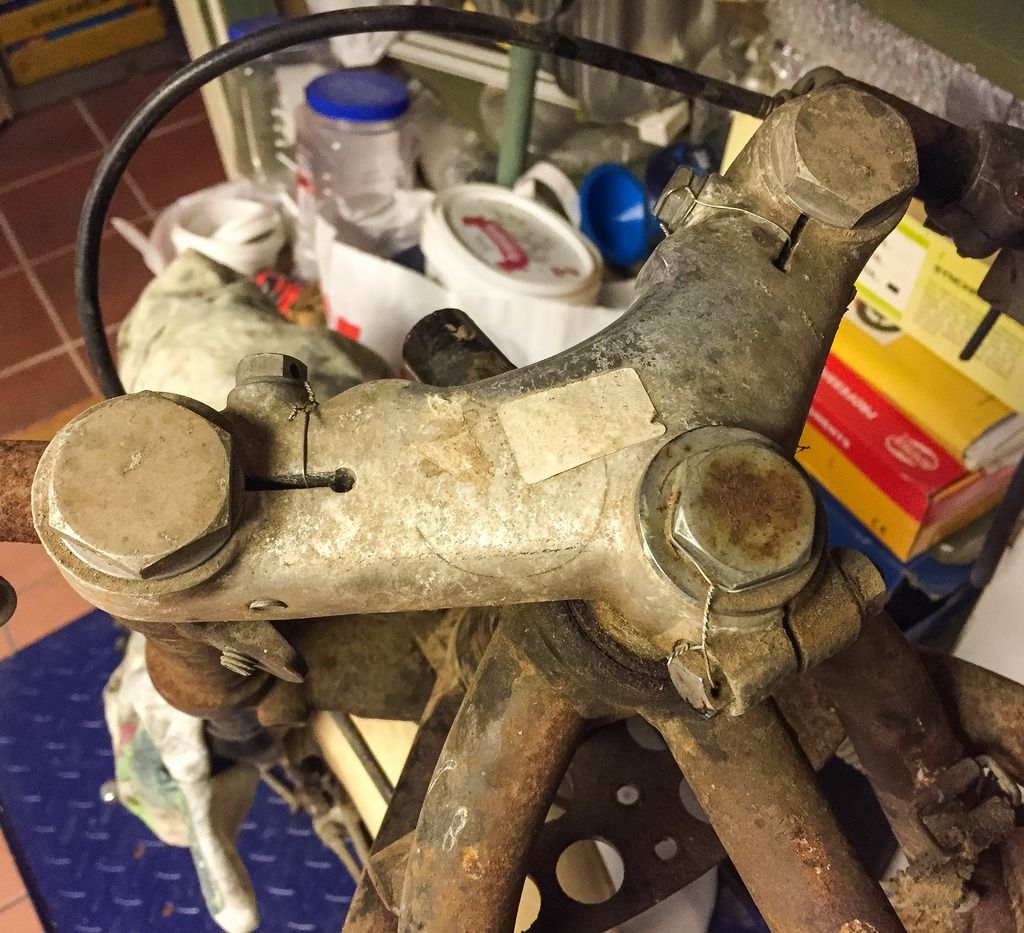
In this picture you can see the top triple tree, the empty holder for the front fairing bracket and the brake cable. Everything comes off easy and without any trouble. That saves me some headaches!


I wanted to get the front fork legs off the frame to adress the rust and pitting on them. At this stage it became clear I´d have to remove the rear wheel first. The stand holds the frame in a way that the rear wheel spins freely and the front is on the ground (the lift...) OK, first thing first....

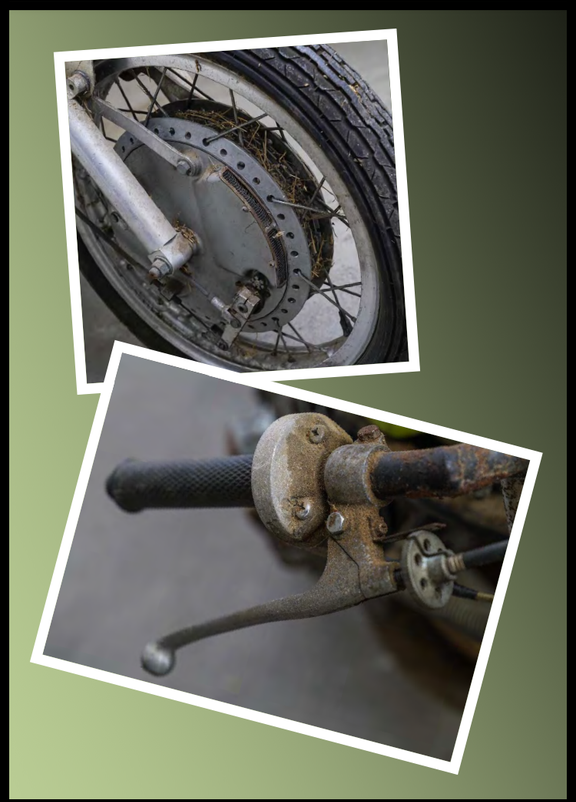
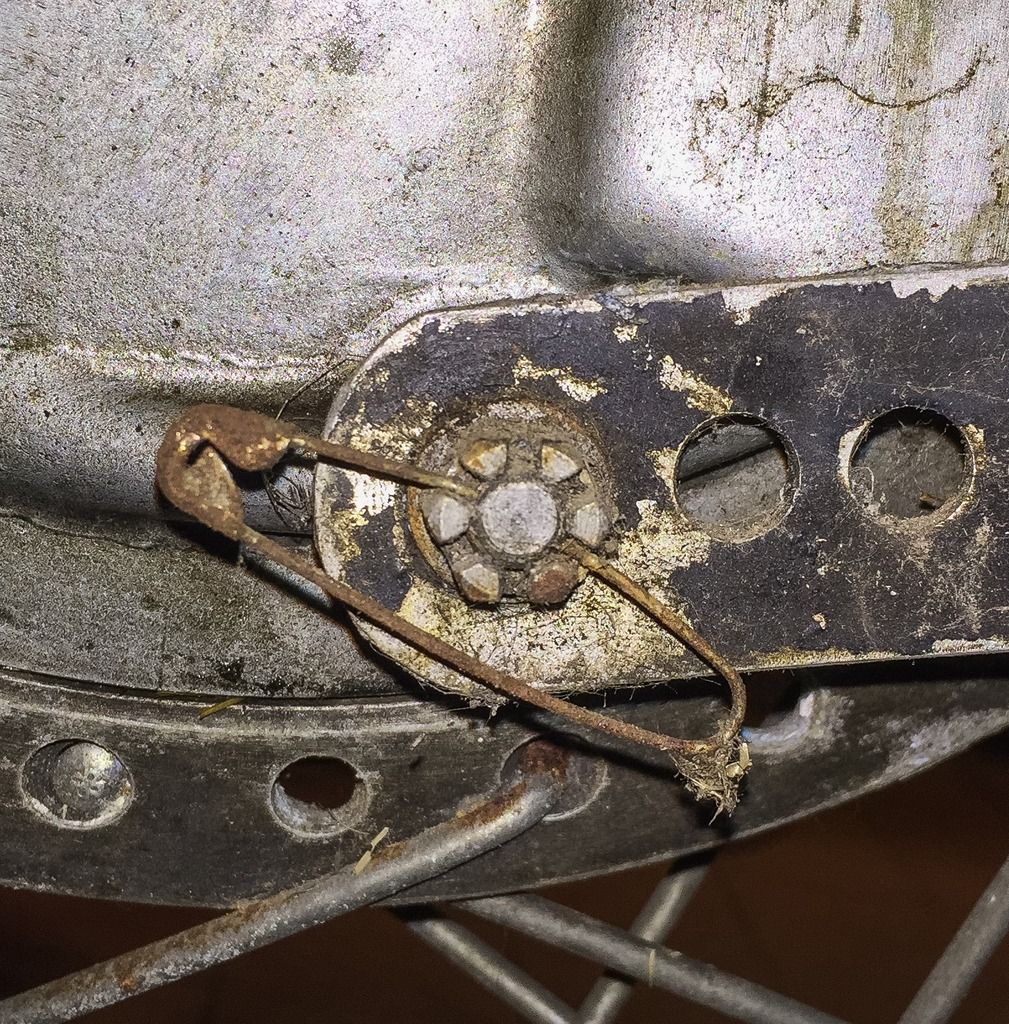
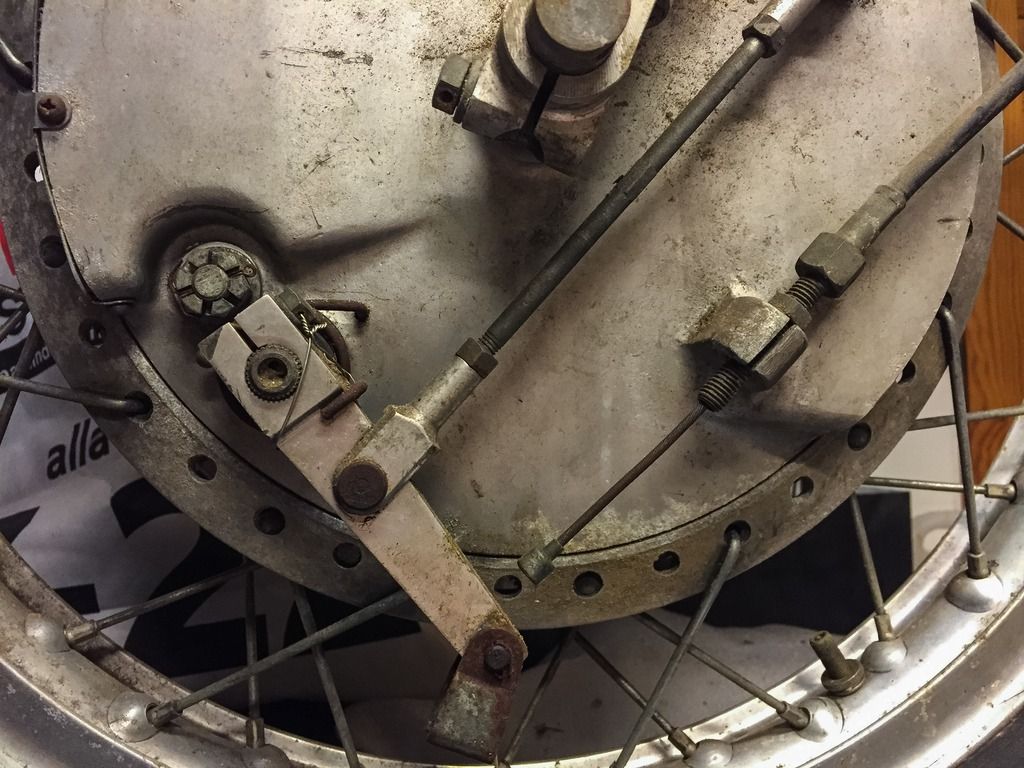
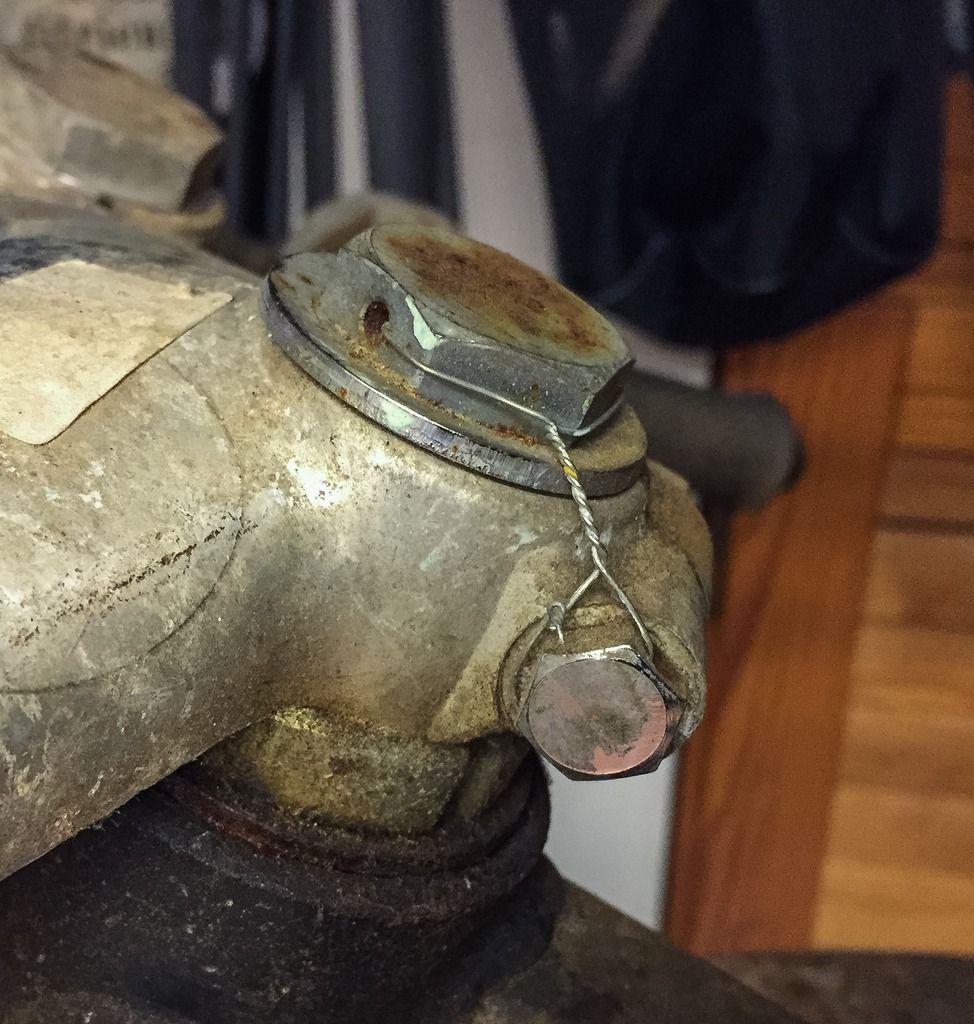
That swing looks like trouble. In fact all fasteners loosened up without much effort so I was ready to take the wheel off. Unhooked the brake cable, loosened the axle nut and, of course, forgot the nut holding the brake torque arm...


What a pleasant surprise! It was actually fixed with a safety pin (sort of...) just as it is supposed to be!

I wonder who put that one there? Did he race with that safety pin? Did it pass pre-race inspection? Well, all I know it has been sitting there for 40+ years! I think it´s a remarkable sign of the times. I´ll get a new cotter pin installed when that time comes!


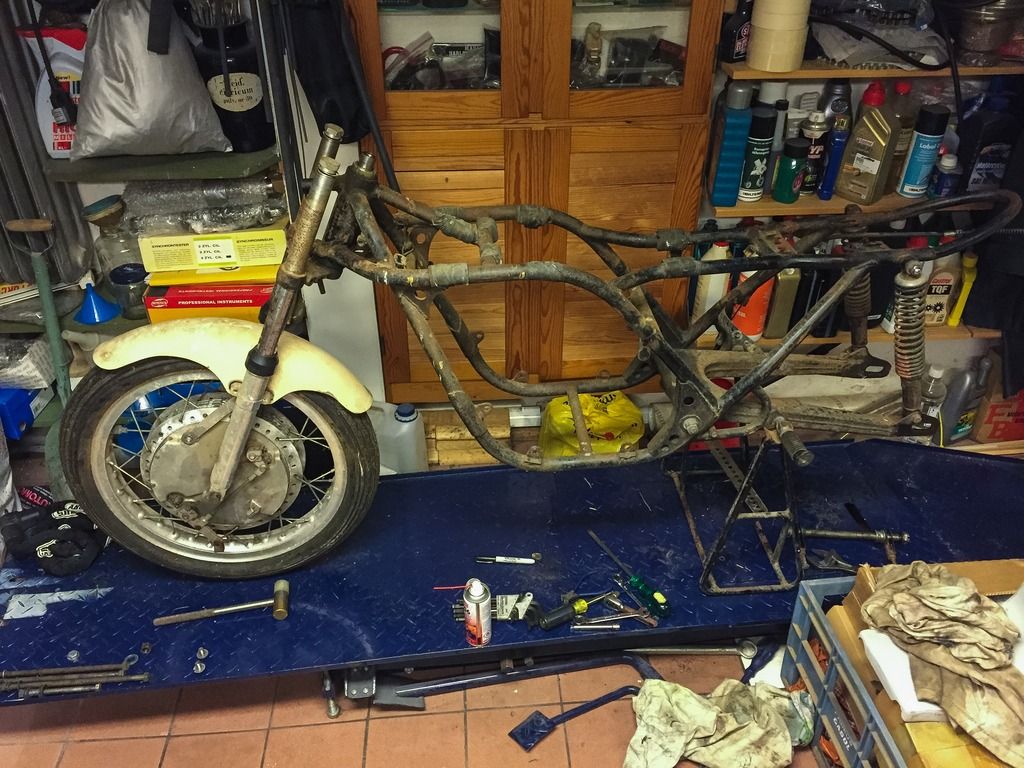
When that was sorted the wheel came off nicely! Next was the swing arm bolt and the rear shocks.


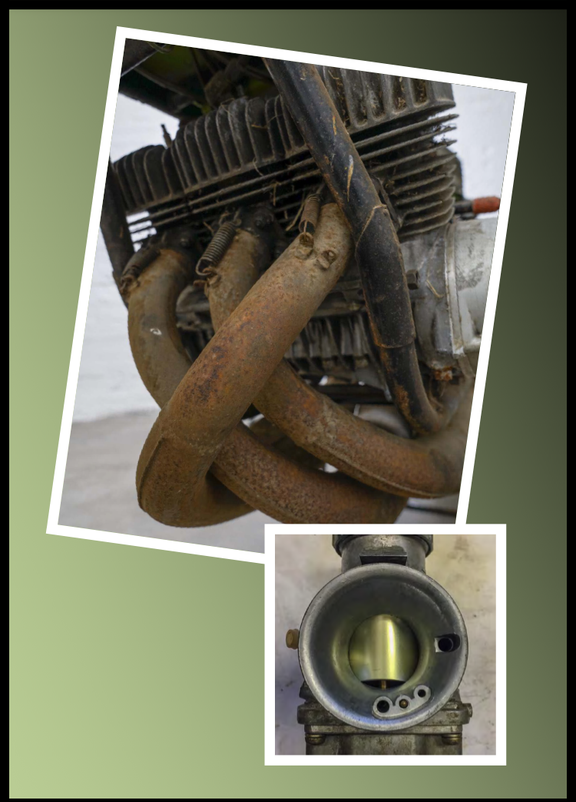
No big deal at all. Came right off. One thing that strikes you when handling the parts on the bike is how light everything is compared to ordinary street bikes. The rear brake torque arm is drilled for weight, the rear brake panel very thin and light. It is obvious the Japs meant business when they built these bikes.


Next off was the front wheel. I tried to remove the fender first but that wasn´t a good idea... Some bikes have a bit too long screws for the fender and they are impossible to remove without first removing the wheel. I didn´t expect that to be the case here, but it sure was... So, the wheel goes off first!


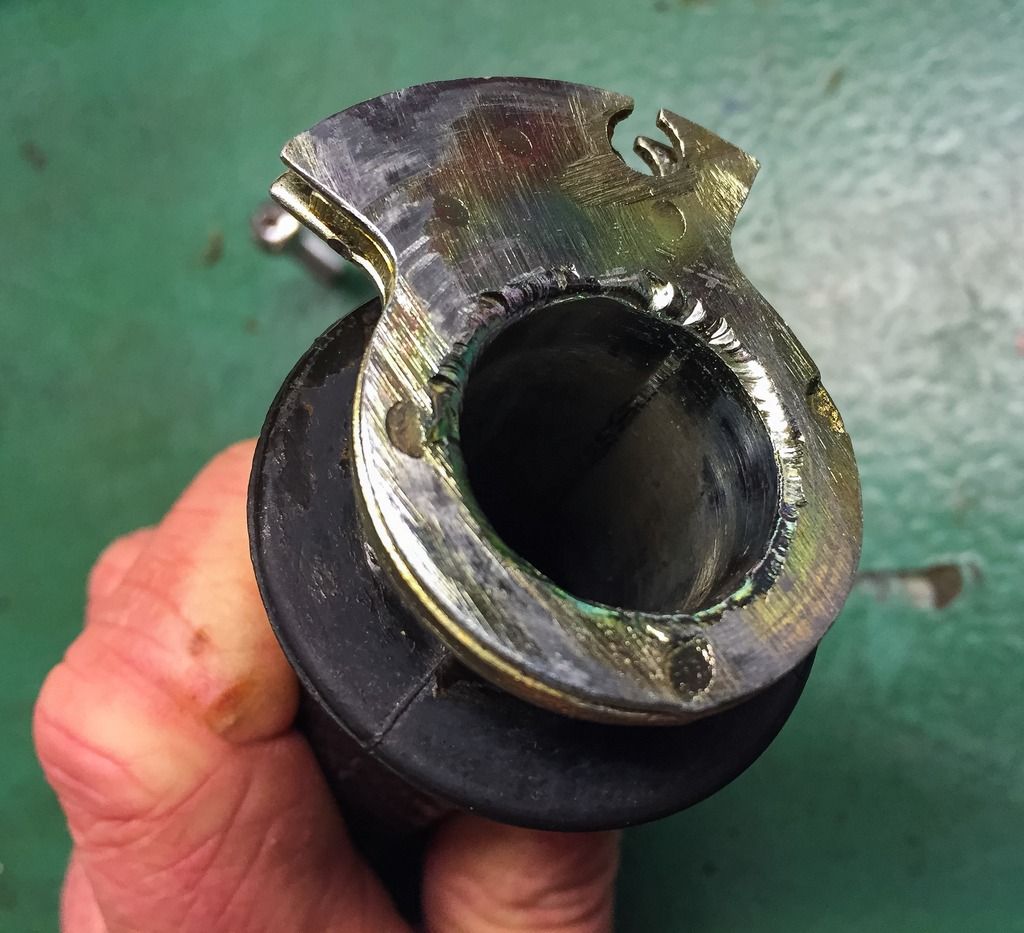
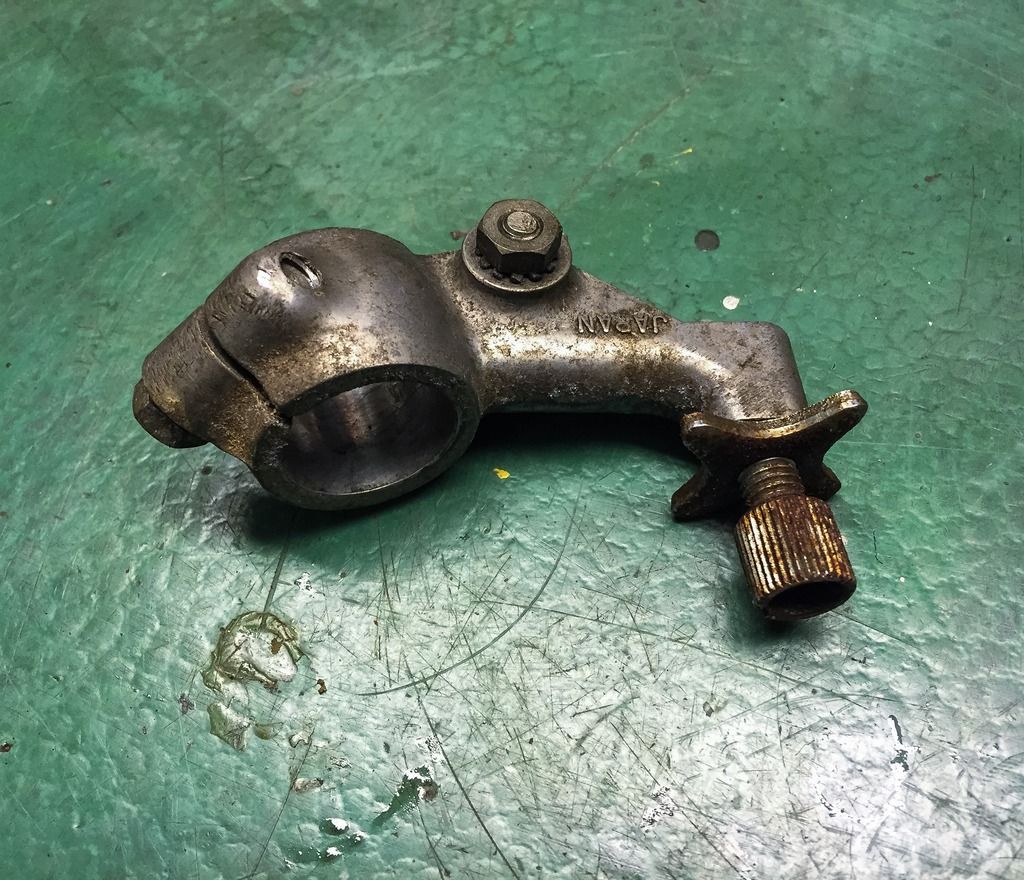
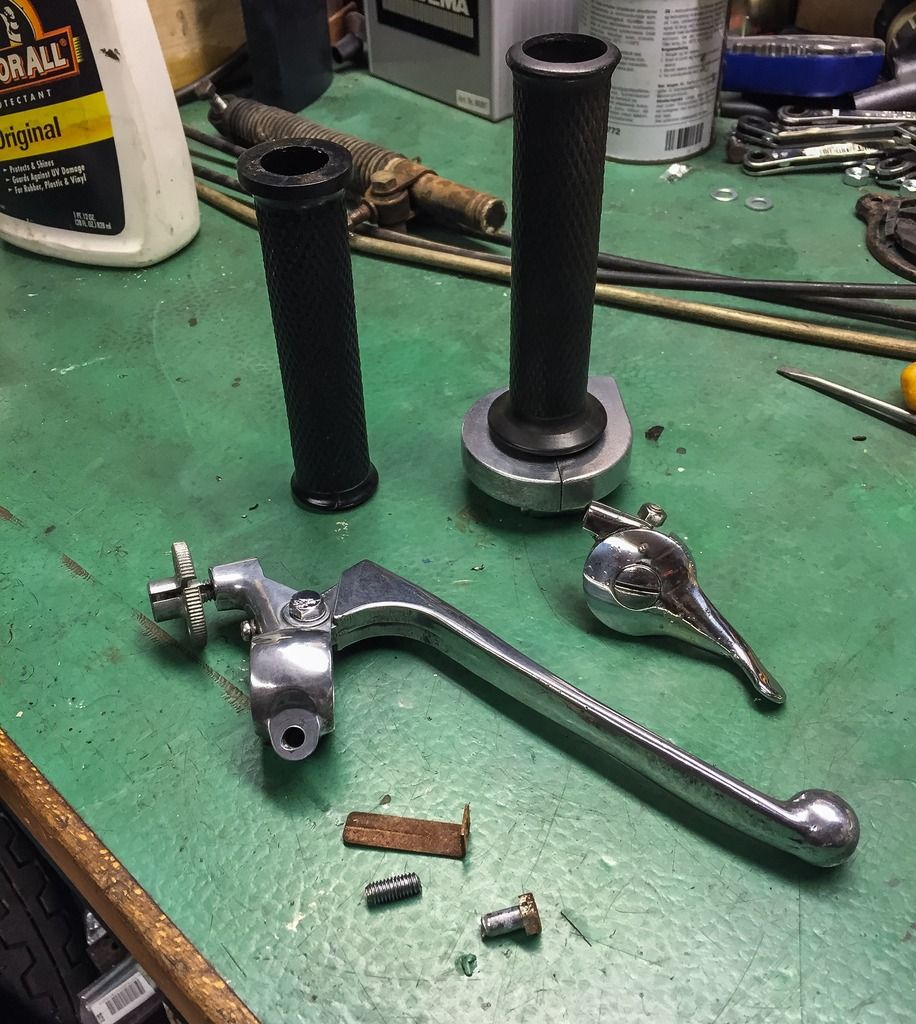
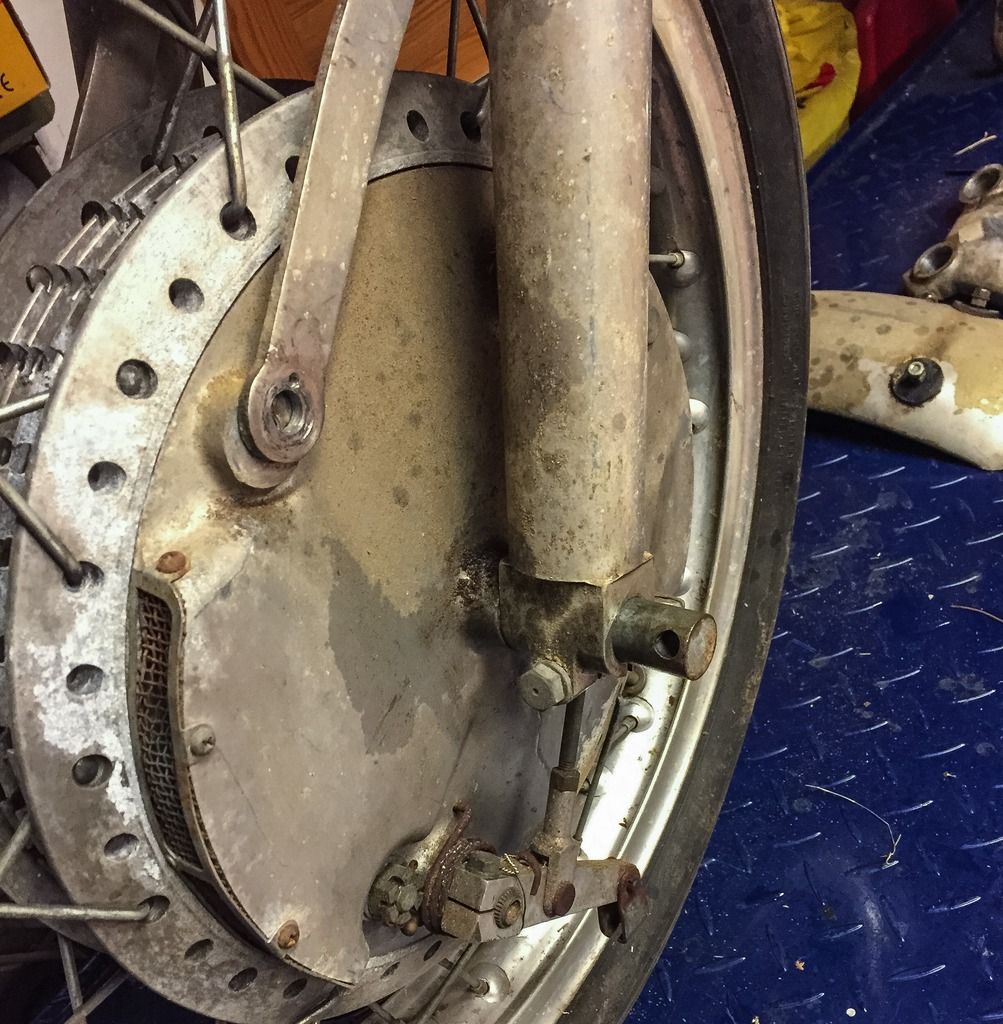
Here I had to unscrew the brake torque bolts first (I remembered these...!), loosen the bolt that clamps the axle to the outer leg and unhook the front brake cables. Very obvious also here how light and optimized all parts are. The torque links are aluminium and weighs next to nothing!


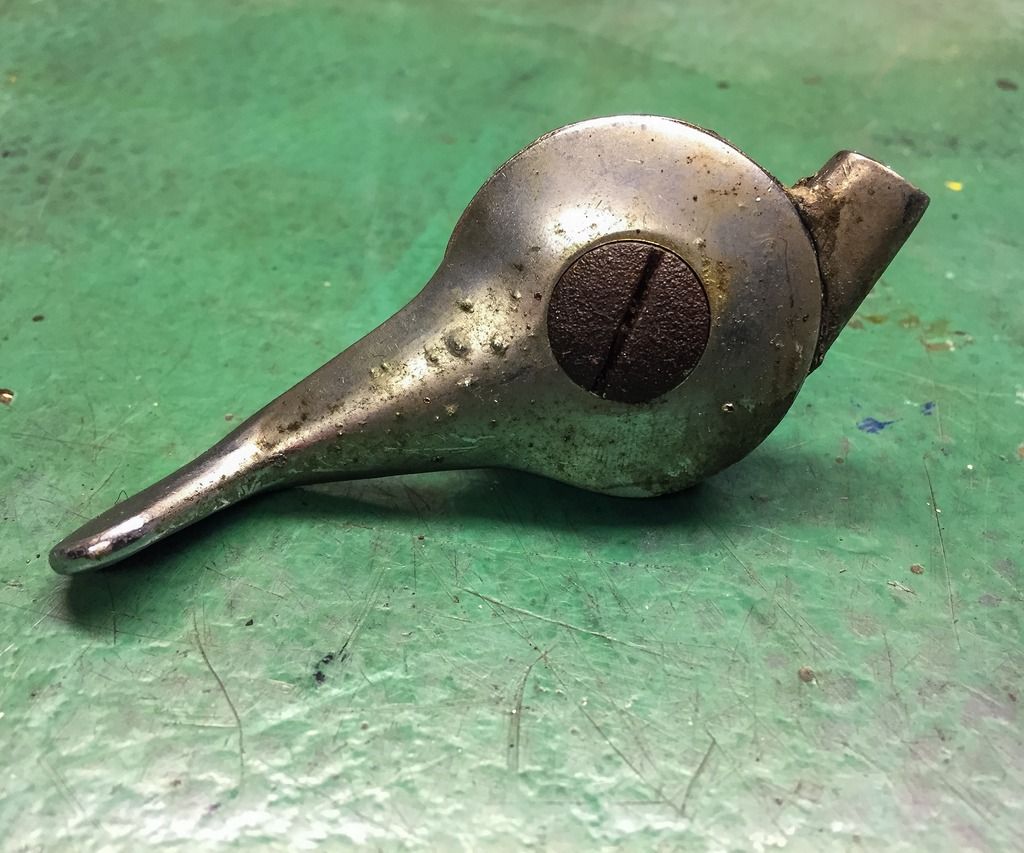
The unhooked brake cable. Note the brake actuators are aluminium as well as the "forks" for the adjuster. Lightweight!
I sincerely hope I´ll be able to just clean the wheel and use it as it is. I am having big problems with not going too far in restoring things on the racer. Big problems.


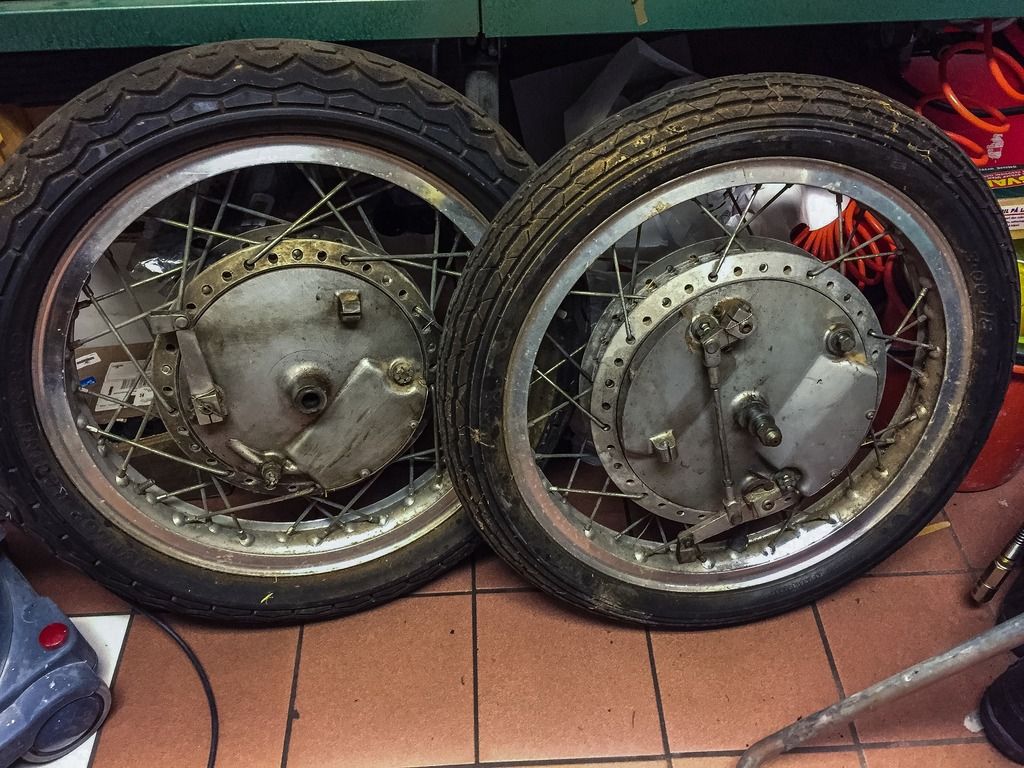
Now it was supposed to be easy to get the wheel off... Well, it proved not to. These tires are old, very old, and hard as ice hockey pucks! I had to use a big pair of pliers (polygrip) to squeeze the tire and get it out from between the fender bolts. Once again I´m struck with the difference in weight of parts. These wheels are much lighter and still has bigger drum up front and a larger hub in the rear, compared to the H1 -69.


Here they are, ready to be worked on later! Nice pair of wheels for anyone building a cool caféracer, right? I wonder how much they would bring at an auction just the way they are...?


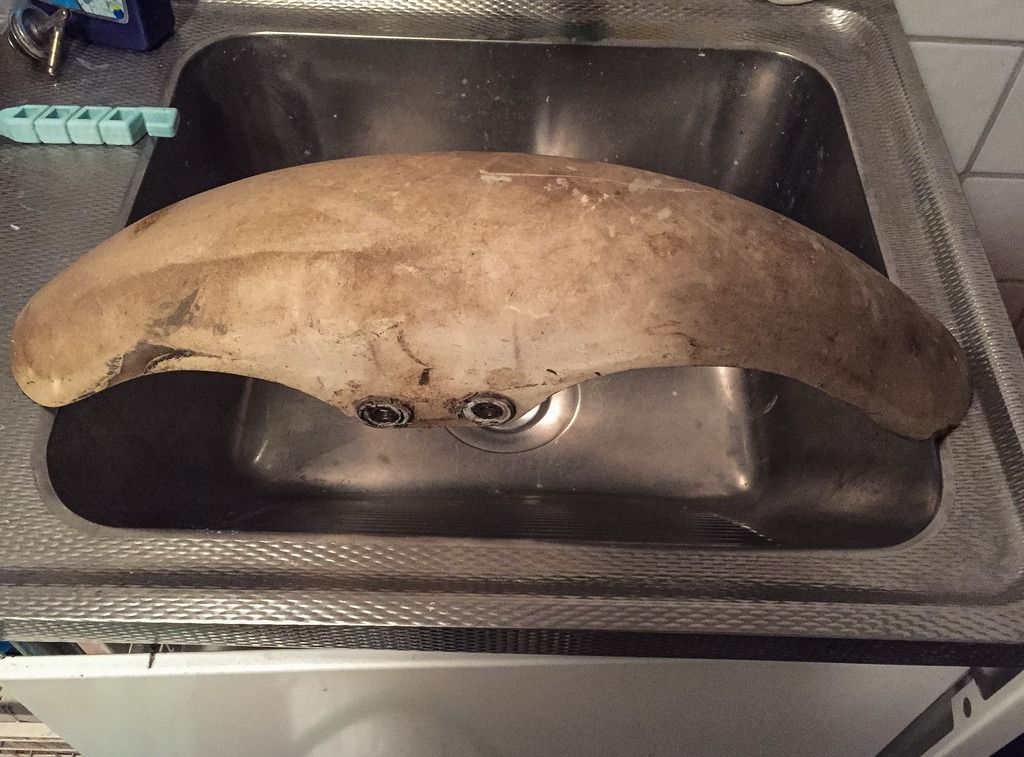
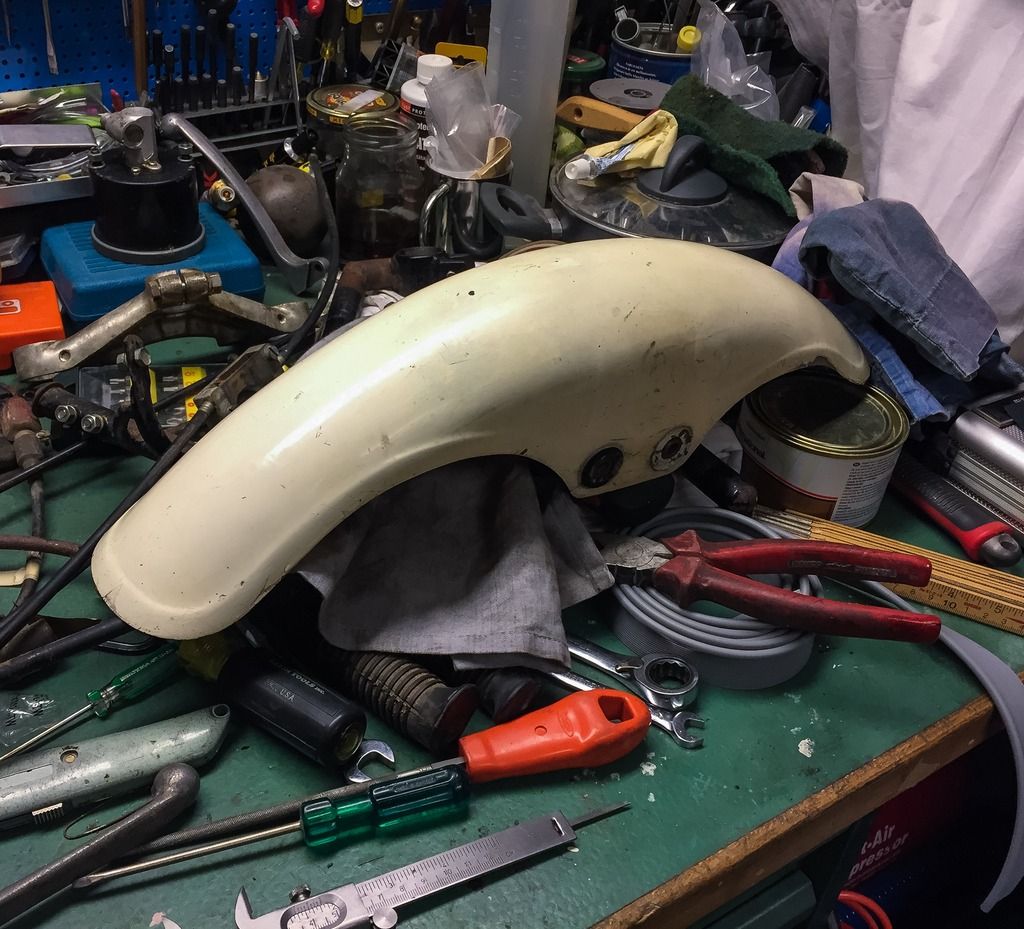
Wheels, swing arm and most everything else is off the frame. Time to get the front fork. First goes the fender. Easy removal of the four bolts and the fender is ready to be cleaned and hopefully reused as is.


The fender in the bath tub... I once again use our laundry room. Has to be done daytime when the wife is at work. It takes a good cleaning of the room each time I use it. Dirt in the laundry room is a future "deal braker" in buying new bikes!


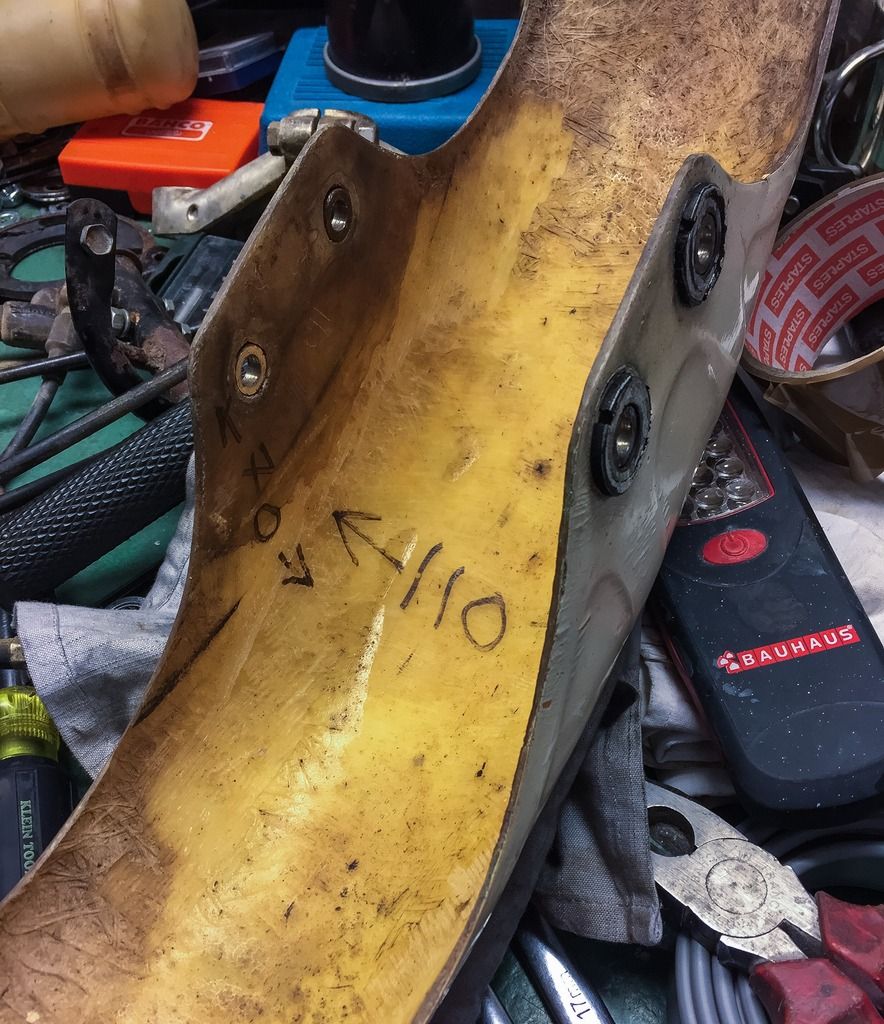
After that bath the fender could be more thoroughly investigated. I believe it is a copy made sometime during the seventies. It looks genuine on the outside but I doubt the original fenders had these measurements written on the inside...??


It doesn´t matter that much to me as I intend to use it anyway, but it would be interesting to know. If you know, please let me do the same! Write me a line at kawapilot@gmail.com


A quick sweep with my POL polish on one end of the fender had me convinced! I´ll use this one! And I don´t think I´ll even repaint it. The final decision will be taken when the rest of the body is going off to the painter.

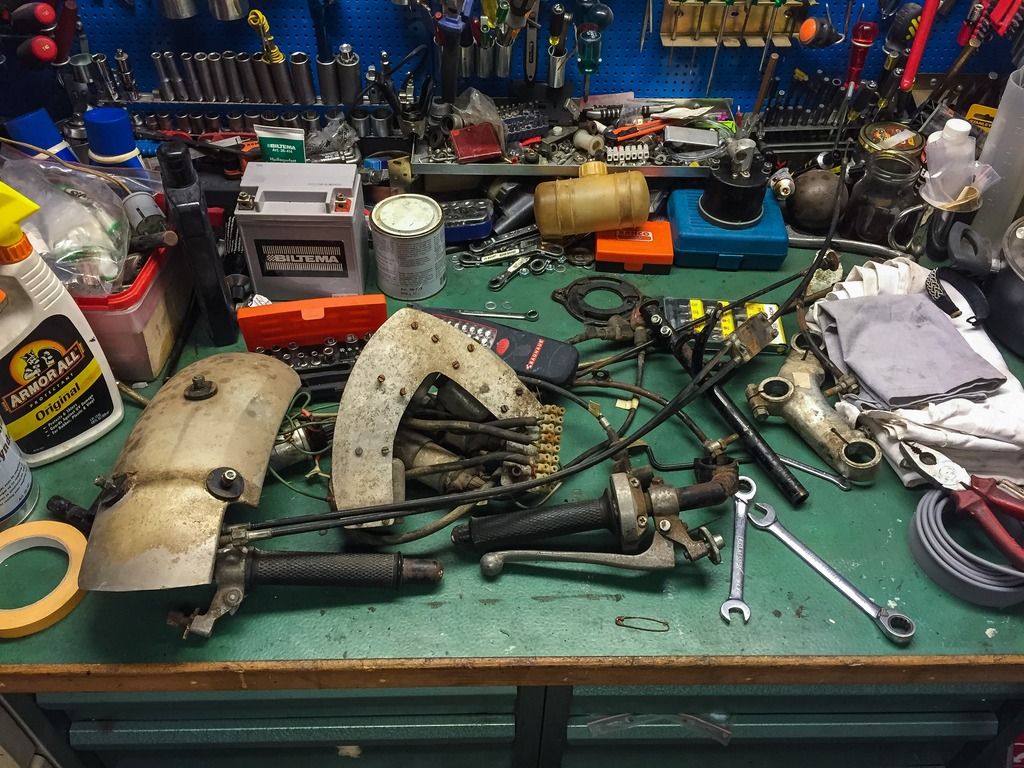
Slightly cluttered bench as parts gets taken off the frame. I couldn´t resist a bit of polishing on the fender before continuing the dismemberment.. Next was the steering bearing!


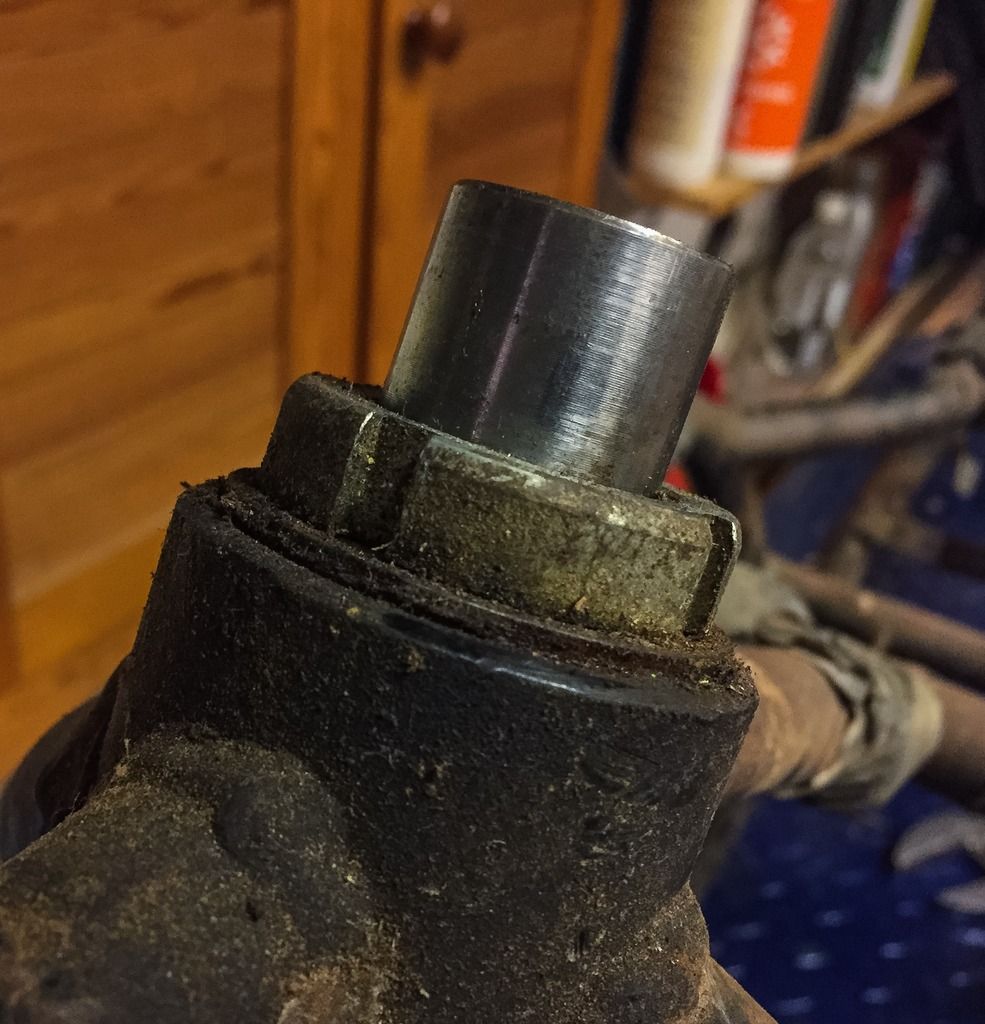
As I said before, everything on these bikes is very simple, basic and focused on function, not looks. Take the steering bearing. No extras here, no fancy covers or stuff to make it look good. Here´s just what´s needed, no more!

When the top triple tree is removed there´s the bearing, right there, below the big nut you tension the bearing with. That nut sits right on top of the top bearing race. Function.


For the next part of the operation you  need to be prepared...  There are 18 (or so..) steel bearing balls in the top bearing and 18 in the lower. A total of 36 small balls that end up everywhere on the garage floor if you loose them! Believe me! I speak from experience. A magnetic tool to carefully pick them up, one by one and a jar to put them in.


Here they are! The little rascals... Nice to see the bearing seems OK. Still plenty of grease on the balls and the races. I have good hope these can be used again!


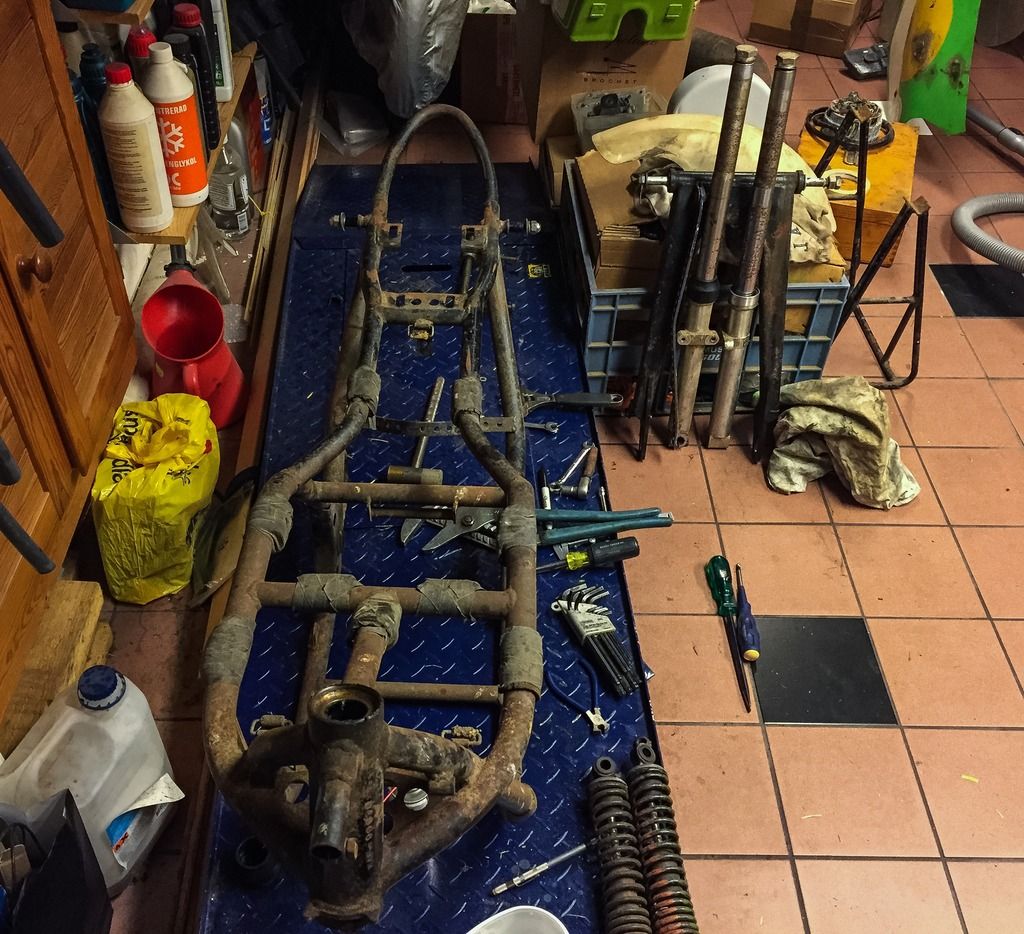
After a few, really nice, hours in the garage it is in parts! Just a few days after the disassembly I got an offer from the magazine "Classic Bike" to exhibit the project on their display in the Swedish Motorcycle exhibition late January. Bugger, that would have been fun!

Not much to display right now....
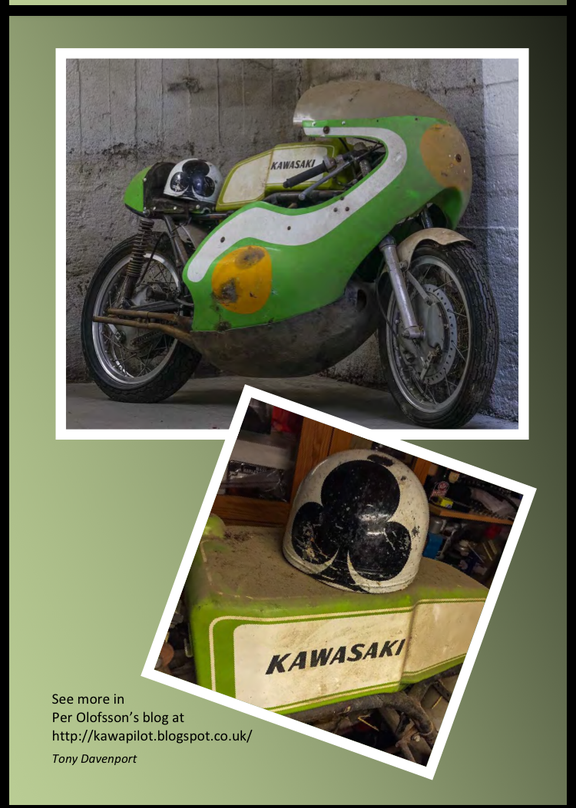
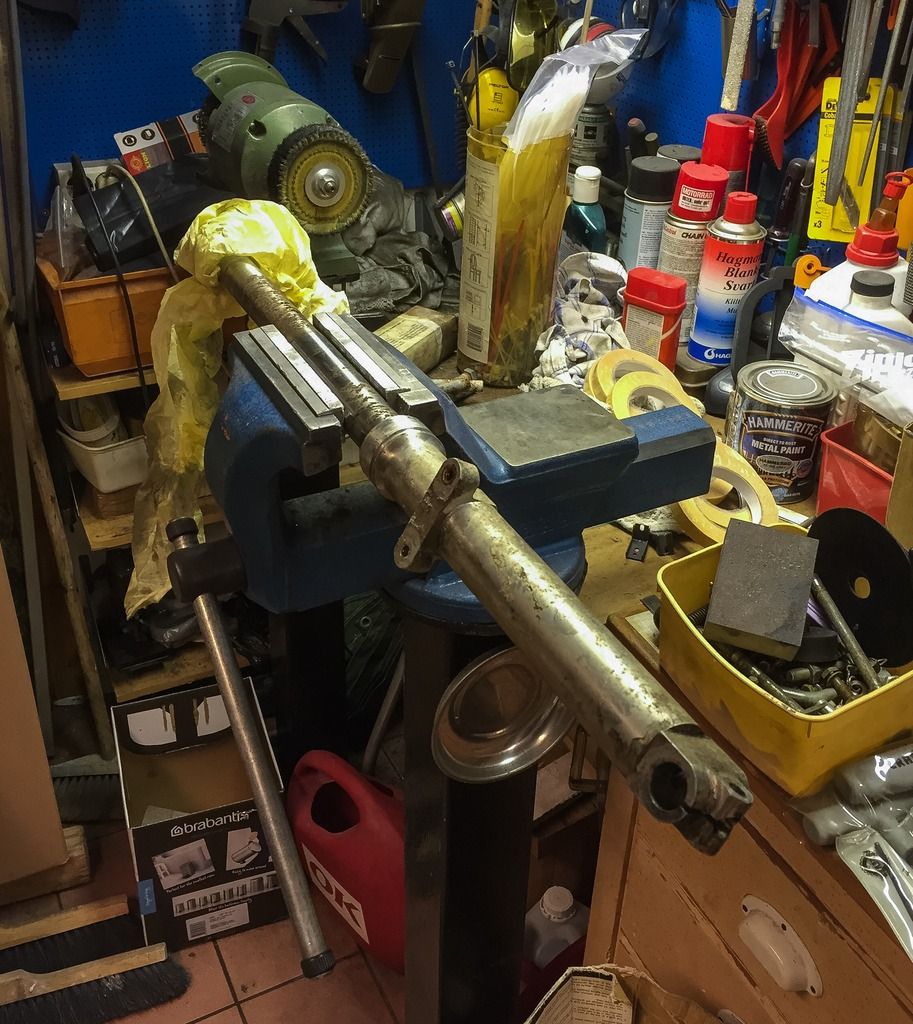
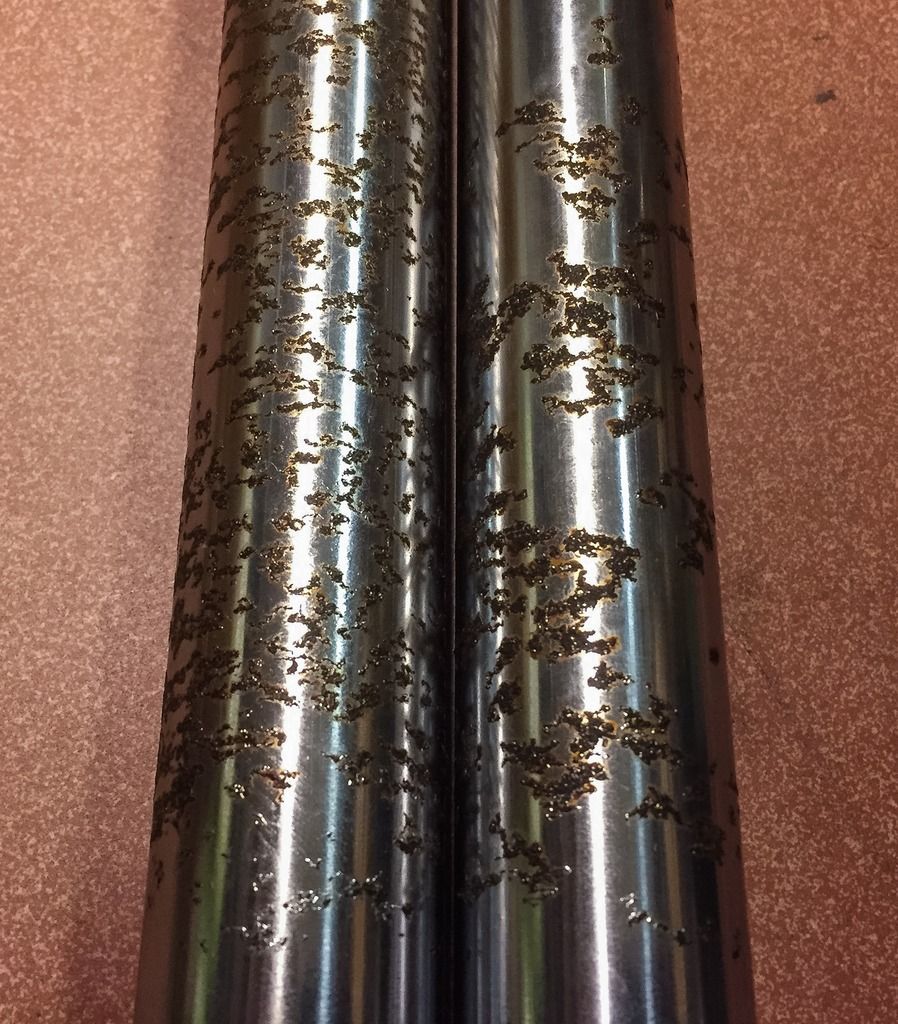
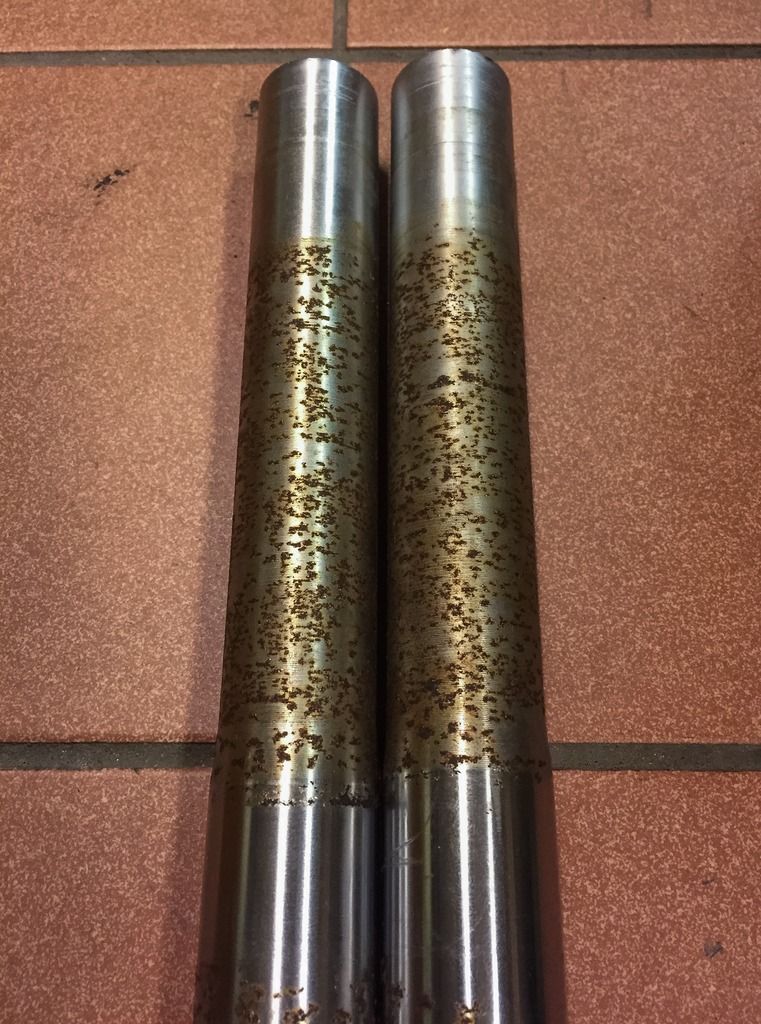
The frame looks great, though. Seems to me to be straight and no cracks, strange welds or anything else out of the ordinary. As you can see, the fork stanchions need to be rechromed or replaced. If you have a couple of  44013-024 TUBE fork-inner, I´m VERY interested! I could also use a set of 45014-052 SHOCK ABSORBER, rear. Or if you have a set of vintage KONI´s model 76, 325 mm long (12 3/4 inches) I´m game! Girling in the same dimension works as well. "Esso" actually used Girlings....


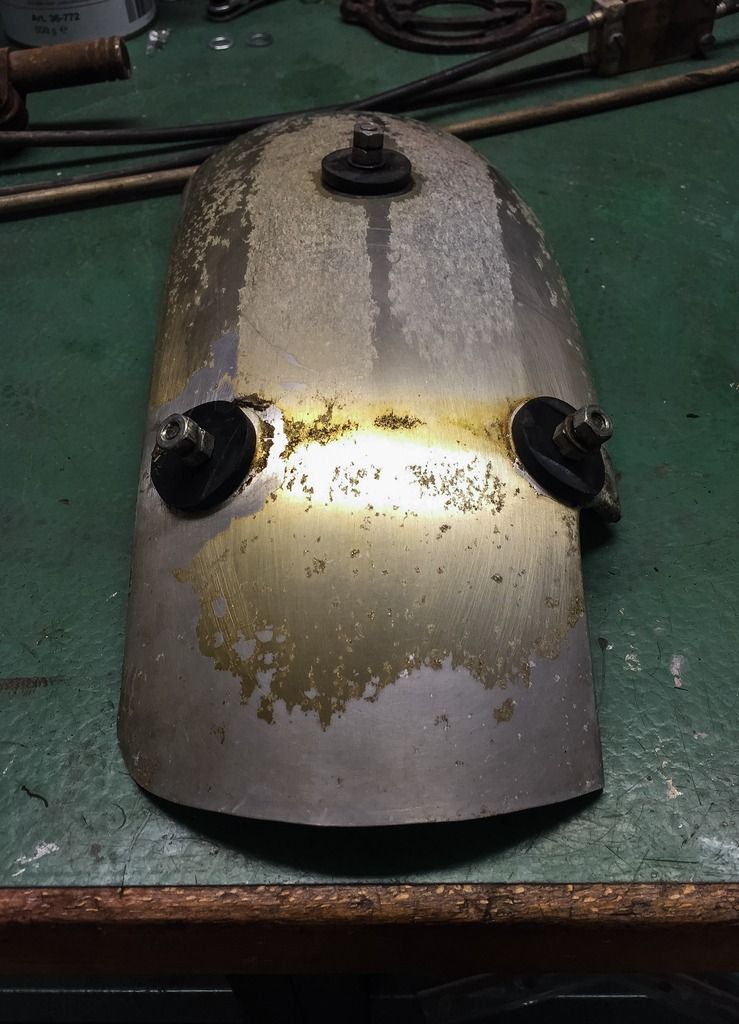
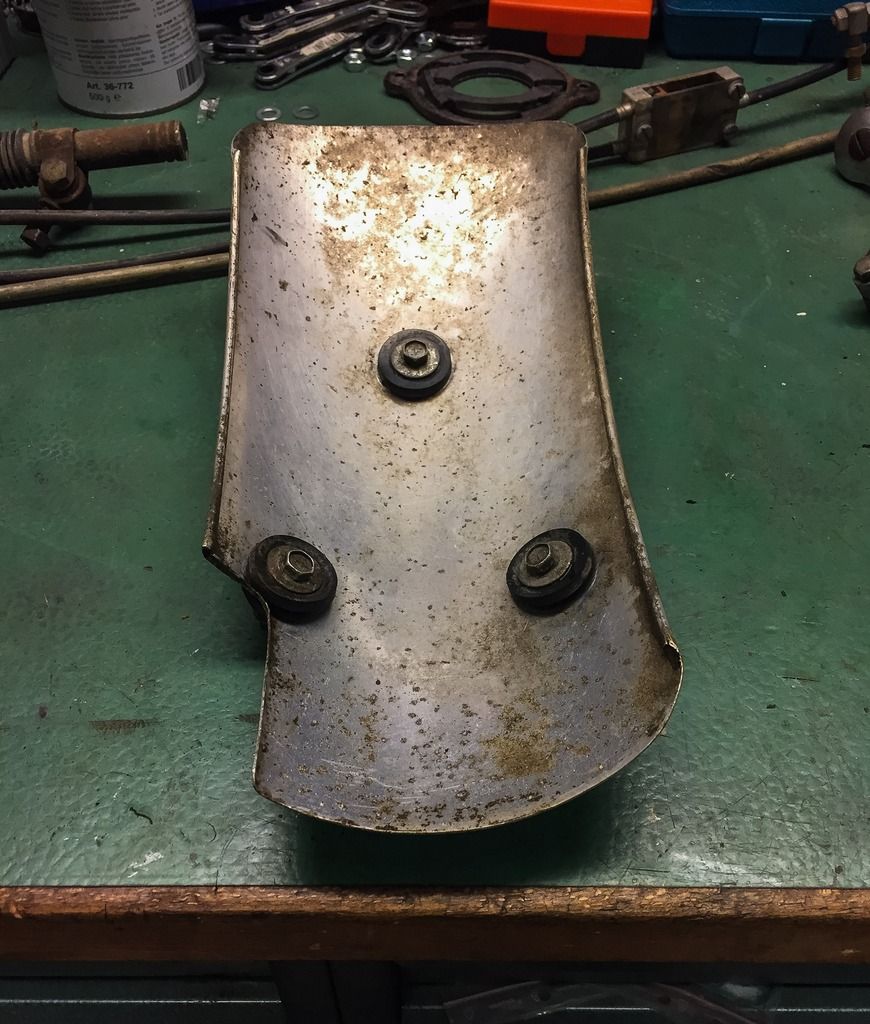
I´m going to end this post with the rear fender. I couldn´t resist tinkering a bit with that one as well. This fender is also a bit of a mystery. Aluminium? All fenders I´ve seen in pictures  of the H1R 1970 seems to be plastic. Part number, 35023-010 FENDER rear, doesn´t say what material is used. It looks the same as in the parts manual, fits perfect and has the same amount of bolts and rubber parts to keep it in place. I´m not worrying too much since I know I´ll use this one all the same, but knowledge is cool.. What do you think?


The fender is held in place by double nuts as safety feature (correct according the manual) and has rubber "washers" on the inside and outside. The fender itself looks legit. Everything on this bike is more or less hand made anyway, so why not this one?! I´m going to polish the varnish away and apply a fresh coat. I can´t have it looking like this. That´s beyond me.


The inside looks the same. Can be stock, or a copy made from some other aluminium fender.... As I said, not that important, but it would be nice to know!


The next post will be about taking the front fork apart and cleaning out some smaller parts!
Hang in there...

/Per