Another week has passed since my last post. A couple of journeys to Copenhagen to do some simulator training. My sim training is soon over and I can start training IRL with an experienced commander by my side for 10-12 legs. It´s going to be sooo nice to get out of the "can"!
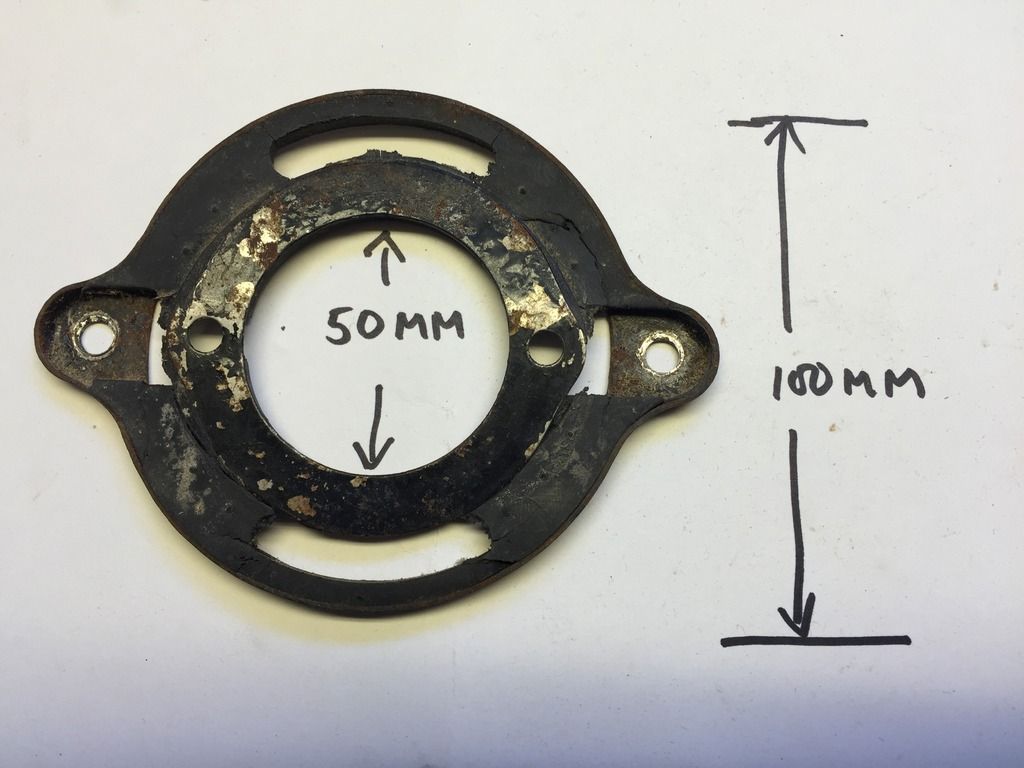
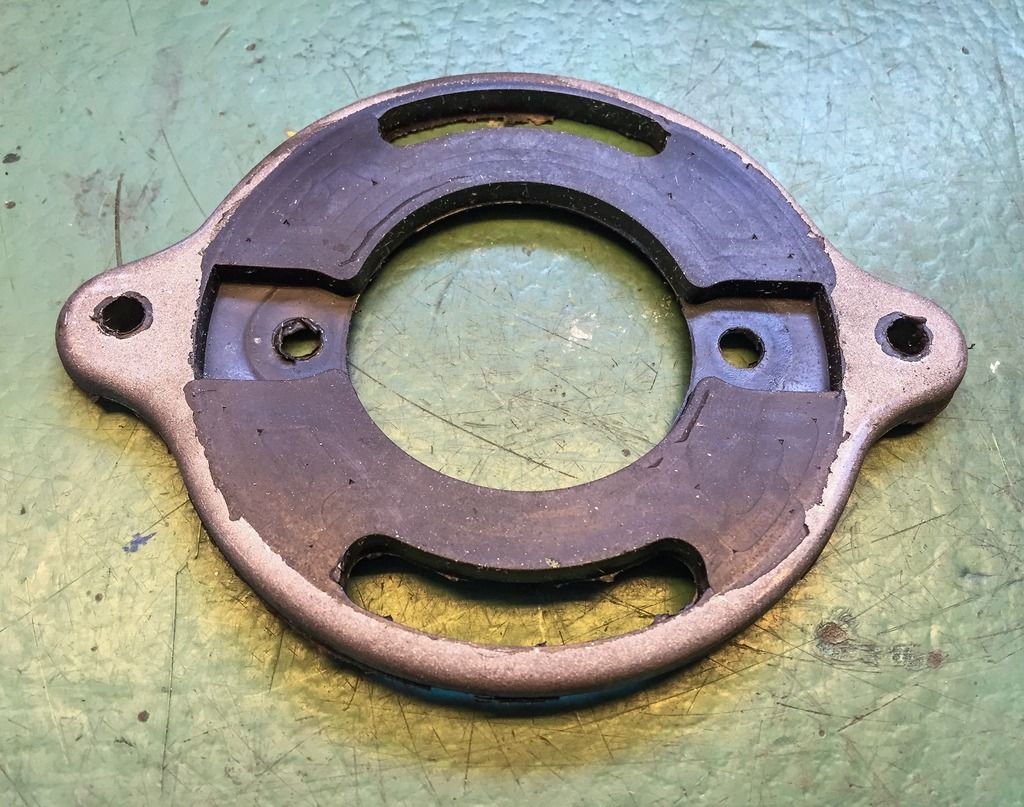
During last week I got a call from the rubber-guy in Linköping. He had my RPM indicator bracket done! Wonderful! It got here in just one day and it sure looks great! Remember what it looked like before sending it to be fixed?
 |
| Before restoration. |
It was broken and beaten up quite severely. The rubber parts were rotted and dry and came apart at the lightest touch. I talked to Daniel Kinnander at Kinnander´s Gummi (Rubber) in Linköping and he agreed to help me out. A true pleasure dealing with people that know their business!
Those steel plates were joined together with the two rubber parts through vulcanization, a process that binds the rubber to the metal in a very strong and powerful way. I could have gone another route and used a modern rubber glue and fixed it myself. Easy, cheap and probably strong enough for the few times this bike will ever be driven on any racetrack. But that wouldn´t have been correct, would it? We went the other way. A correct vulcanization of the parts!
To do that you need to manufacture a mold. You put the primed steel parts into the mold and pour whatever rubber mixture you prefer (different mixtures have different properties...) and start the vulcanization process by applying high pressure and high temperature to the mold. To be honest I had no idea these products were so difficult to manufacture. Anyway, Daniel has an old friend who makes molds in smaller series for hobby applications like mine. Regular production demands better molds, of course.
The reason it took so long time to get this done was the making of the mold. Quite a complicated task when you see it.
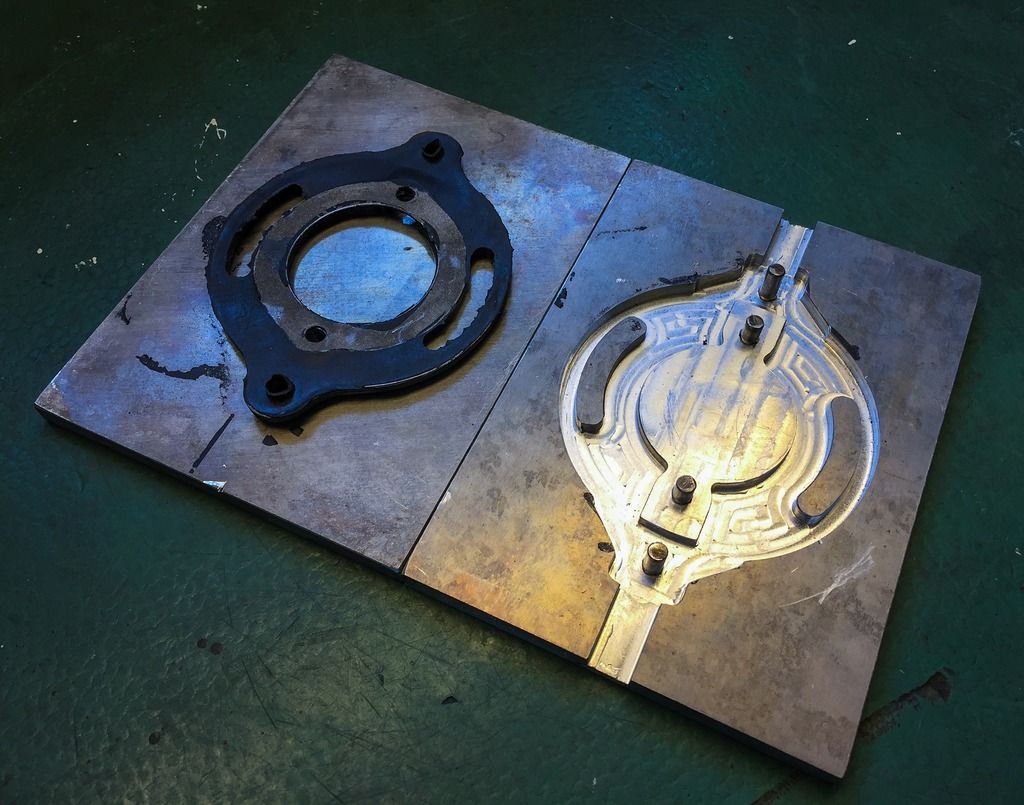 |
| Bracket and mold. |
As you can see in the picture the mold is milled in billet aluminium after the shape of the two steel plates. The bolts keep it all in place and the rubber can be poured into the mold from two sides. The two aluminium parts are pressed together and the rubber cures onto the primed surfaces of the steel parts. The areas of the steel that hasn´t been primed can easily be cleaned from rubber and make the part look just like it did before. I can do that... Cleaning and spray painting is not so difficult!
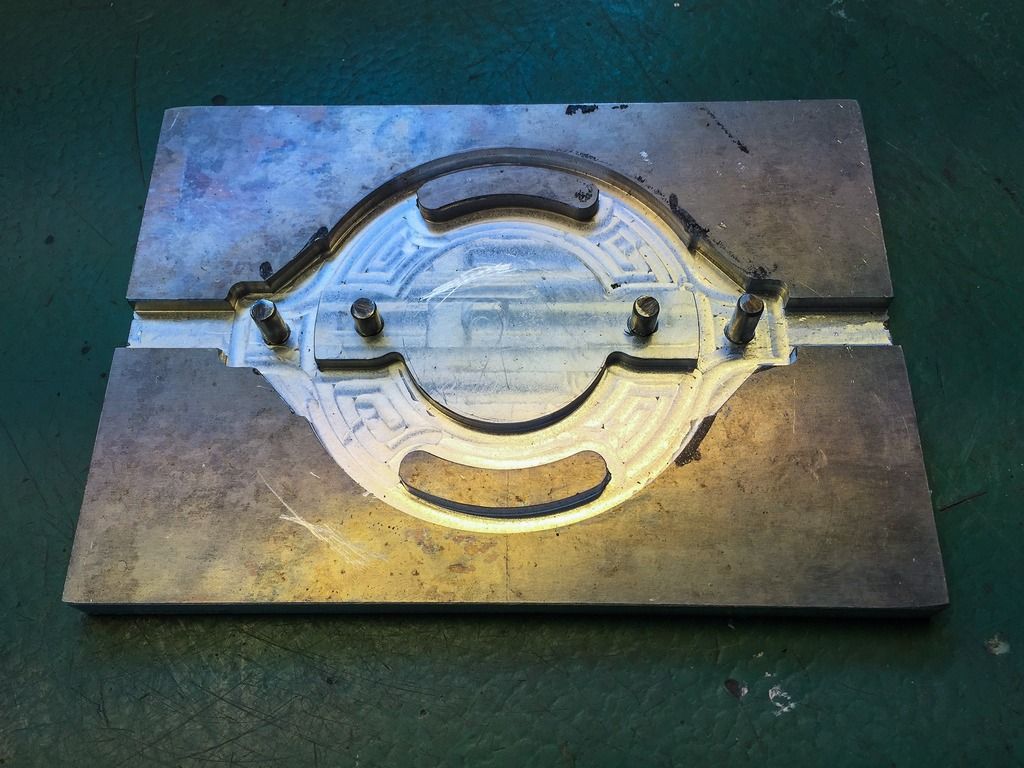 |
| The mold. |
The beauty of it all is that I actually bought the mold, the most expensive part of vulcanization. Since I paid for it, I own it, and Daniel sent it to me. Nice. Now I can repair the RPM indicator bracket if someone needs it done! The actual vulcanization only costs approx $100US or 90 Euros. The mold cost me ca 300 Euros to have made. Now I need to work a bit on the bracket to make it perfect.
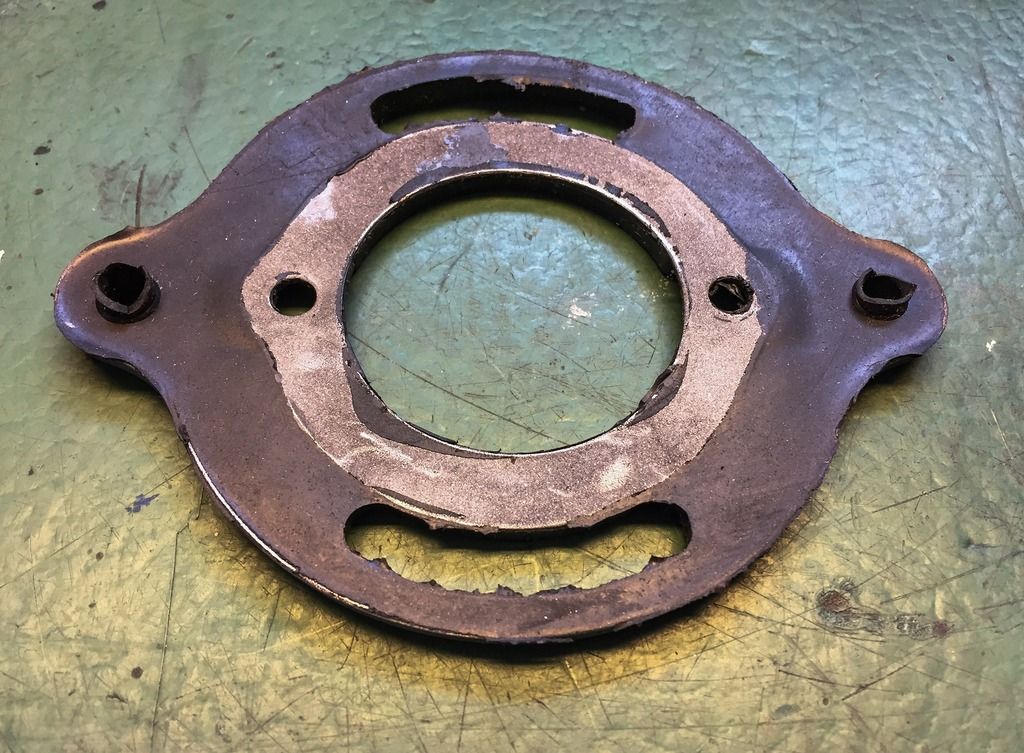 |
| Repaired bracket. |
 |
| The other side. |
The rubber used here is Cloropren rubber. A stable and weather proof type of rubber that also can take a lot of vibration and sunlight. Daniel said they use it a lot on the JAS, the Swedish fighter plane. JAS is actually built by SAAB in Linköping so my bracket is in good company!
I´ll start working on the bracket as soon as I can find the time for it. Busy days ahead.
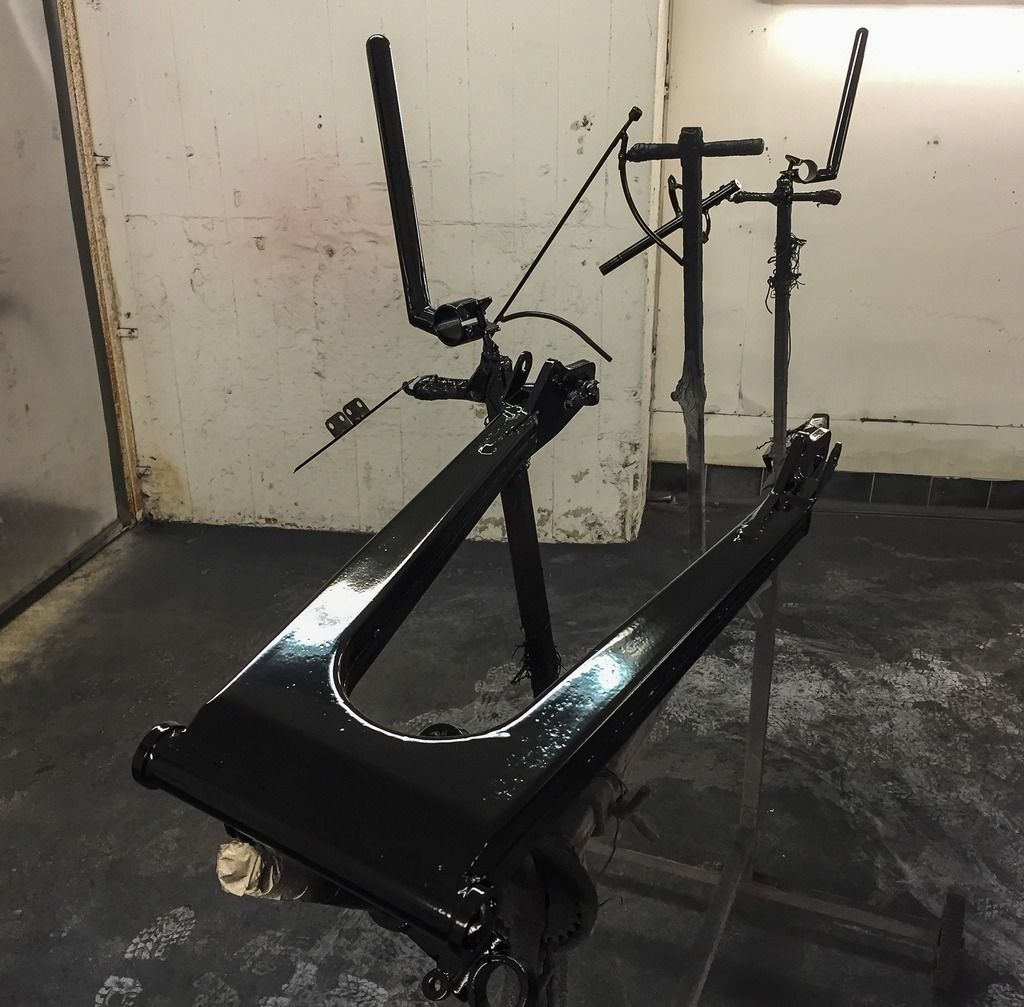
Last week I also delivered the frame to Eduardo across the street. We had a long discussion about the painting and agreed to have it done step by step so we could agree on the next step as it went along.
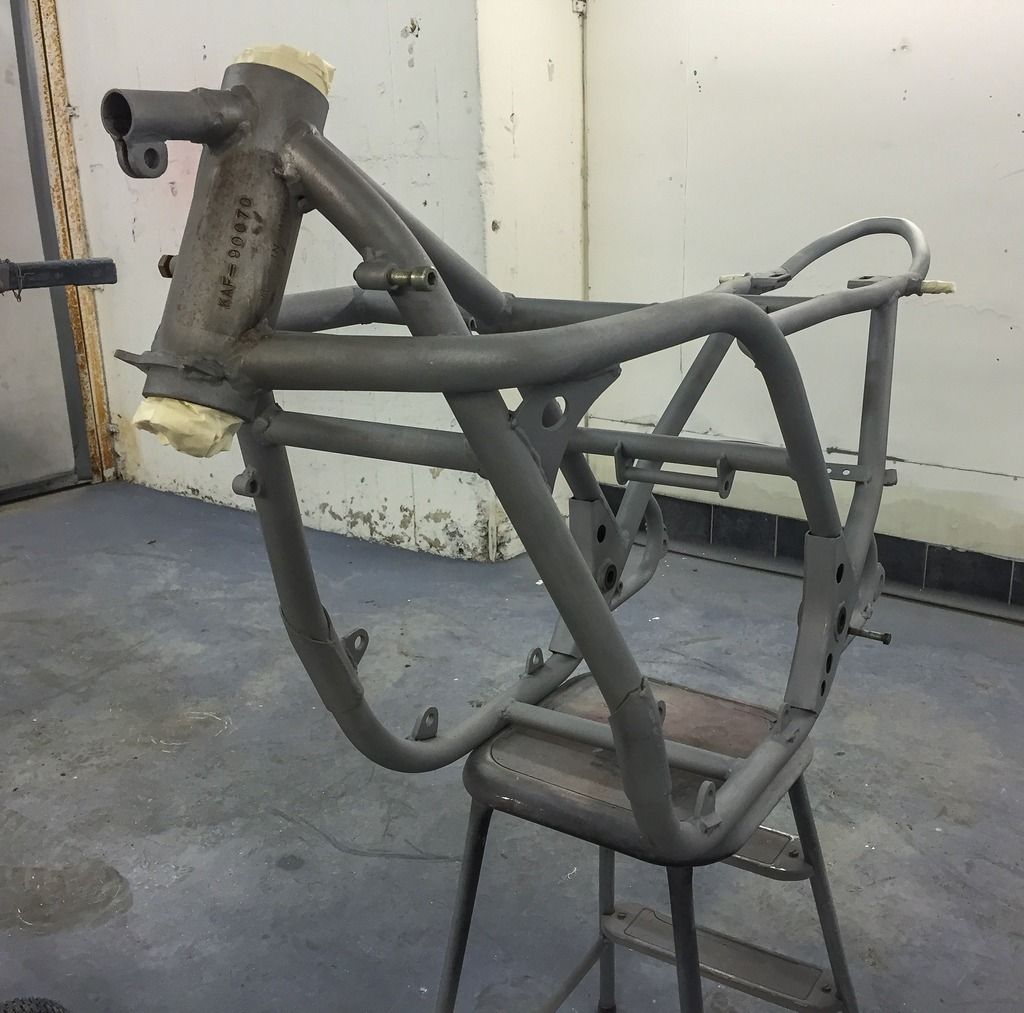 |
| The naked frame. |
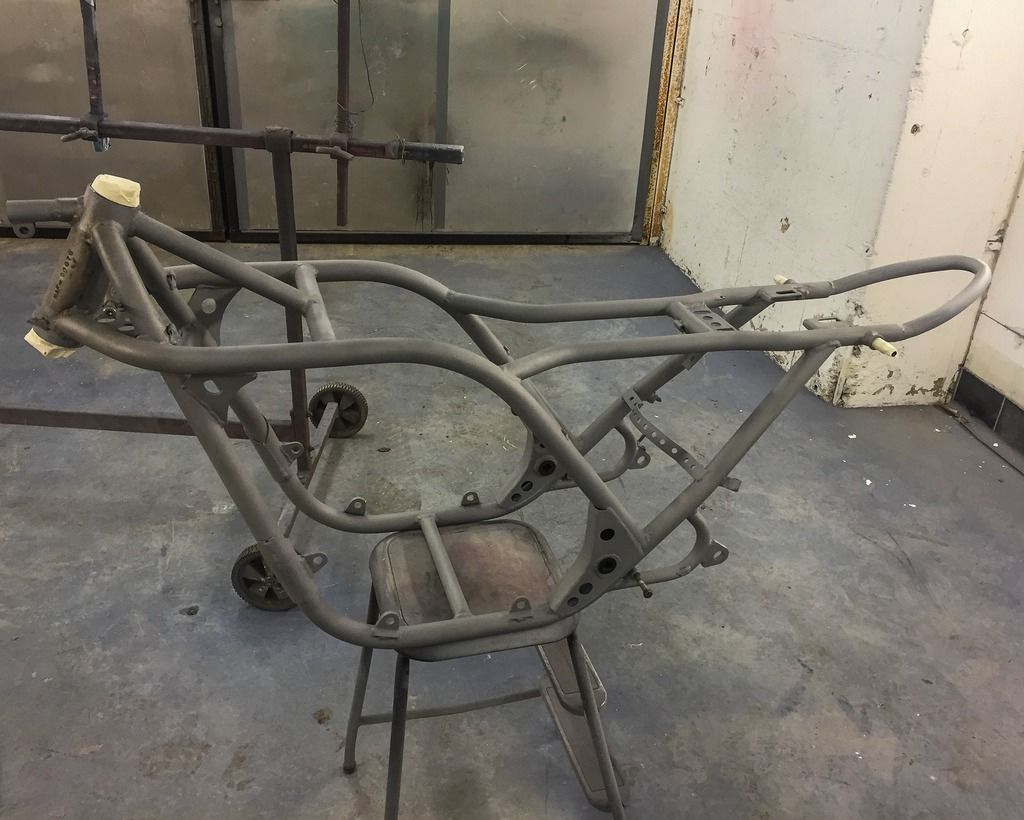 |
| Prepared for spraying.... |
After a couple of days I came down to the shop and found the primer on! A very light spray of black epoxi primer. Just perfect! Exactly the way I wanted it done. Again, such a pleasure to deal with professionals!
 |
| Primer on. |
Perfect surface for the next coat of real paint.
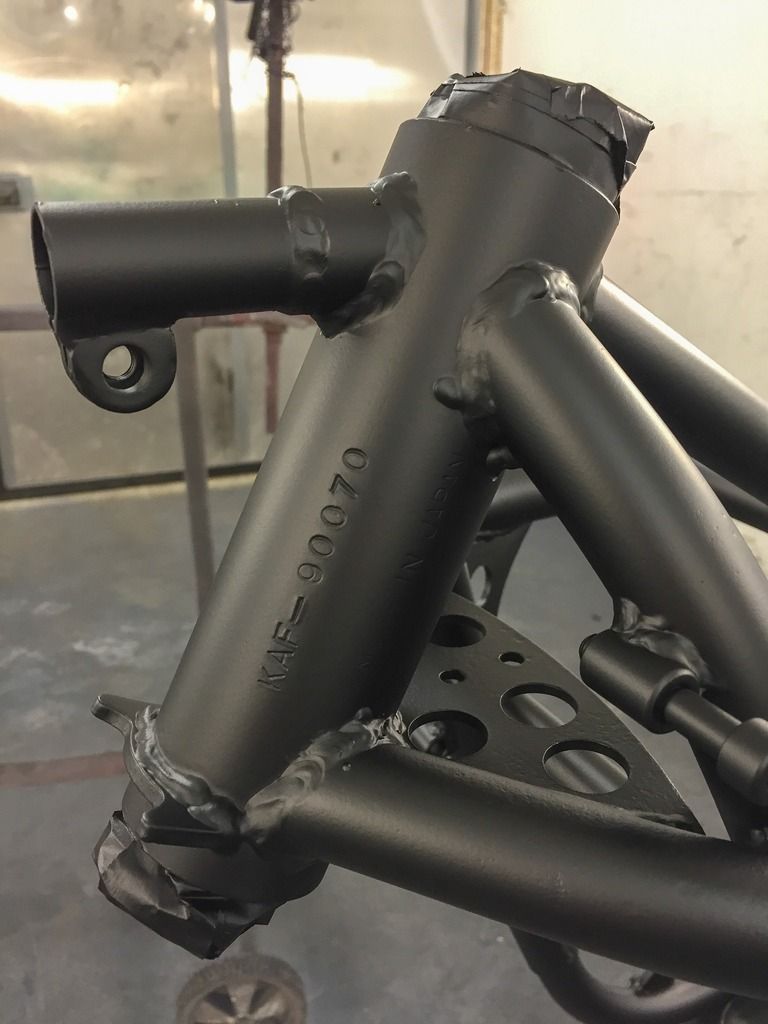 |
| Primed frame number. |
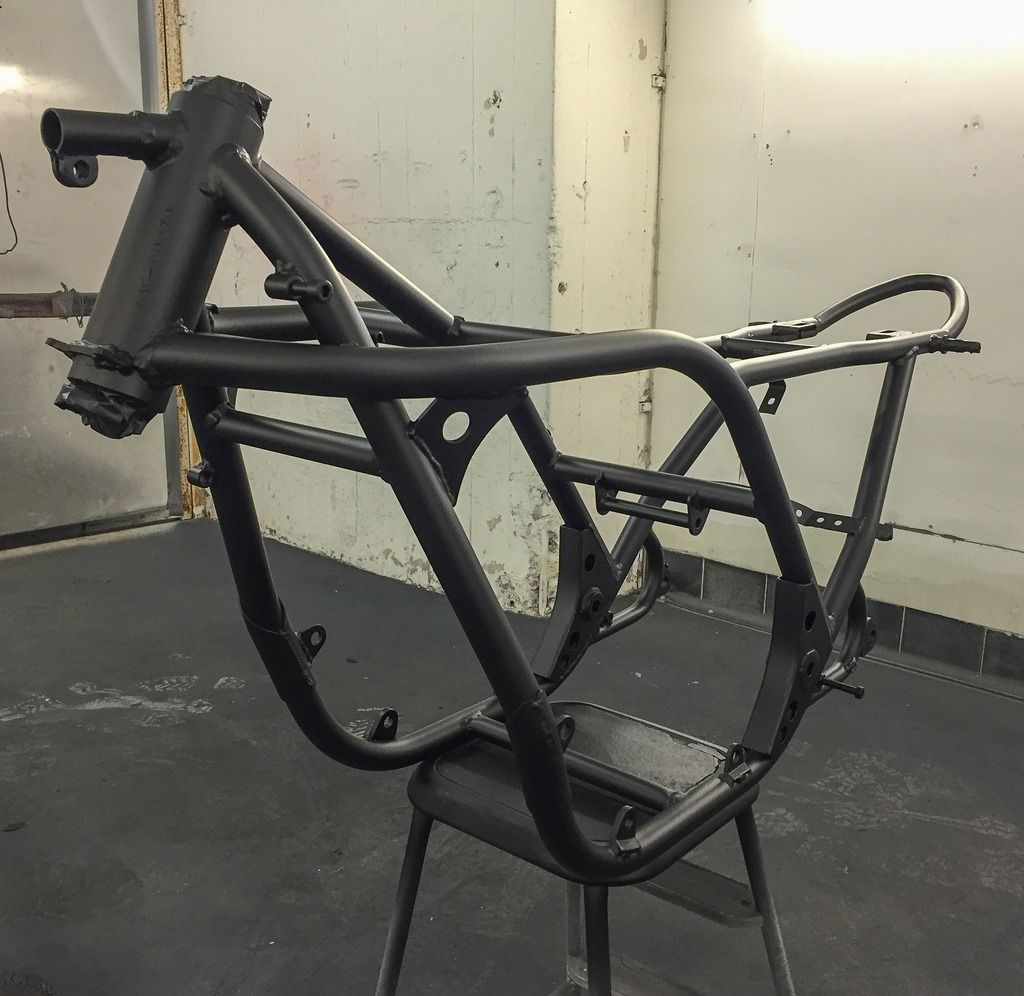
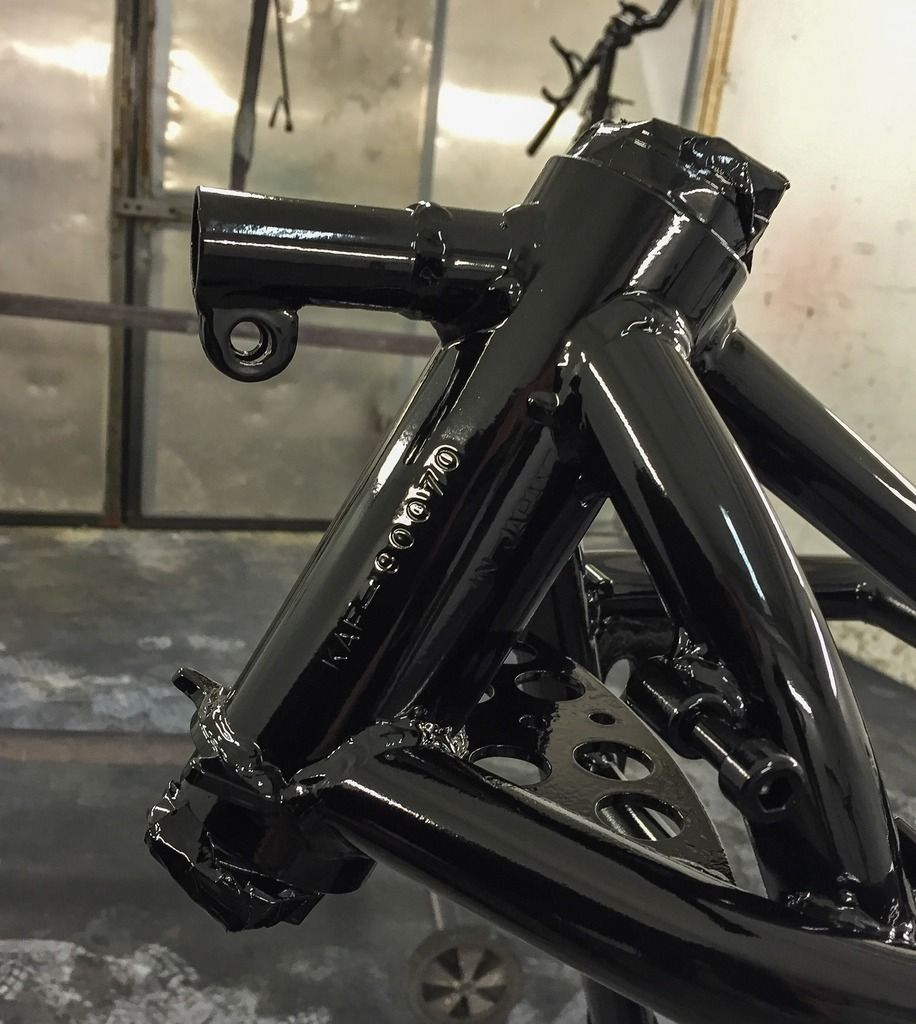
And today (Sunday) the frame was done! a coat of black paint and a coat of semi-gloss clear coat. I think it looks just right! Eduardo was worried it came out too shiny. I think not. Just perfect!
 |
| Finished! |
 |
| Too shiny? |
 |
| Still very readable! |
Still very readable frame number on the head stock. Tomorrow I´ll carry the parts back to my own garage and start putting things together again! The true turning point of the project approaches!!
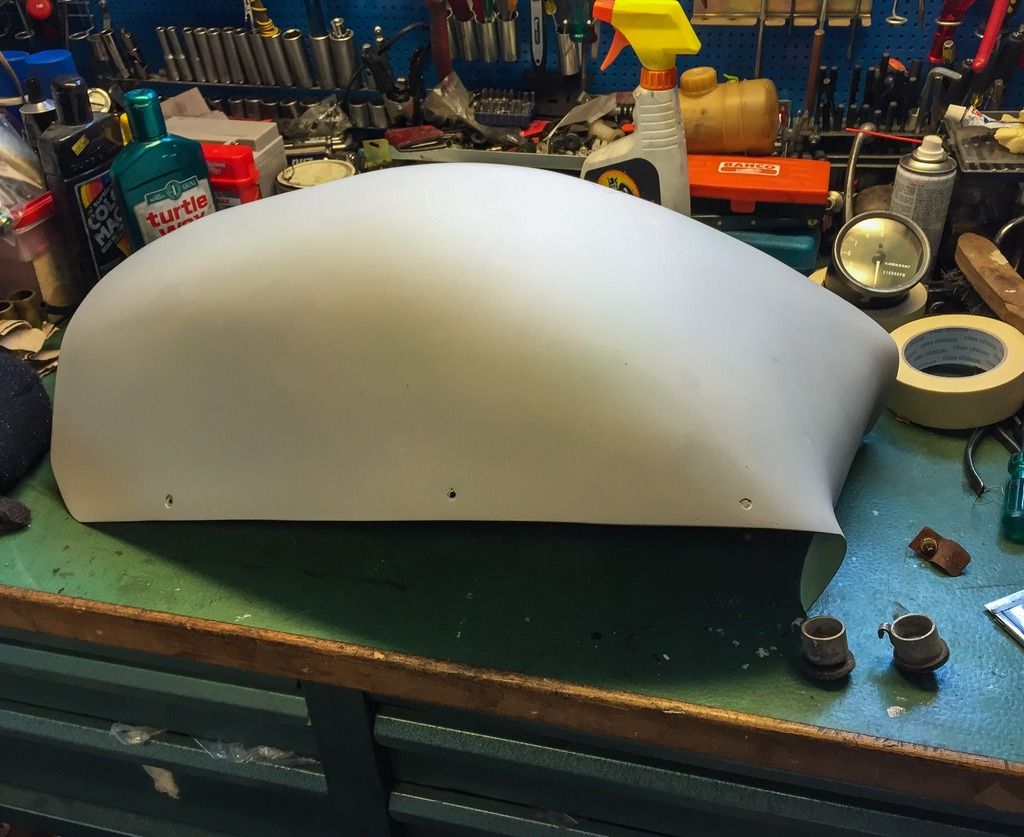 |
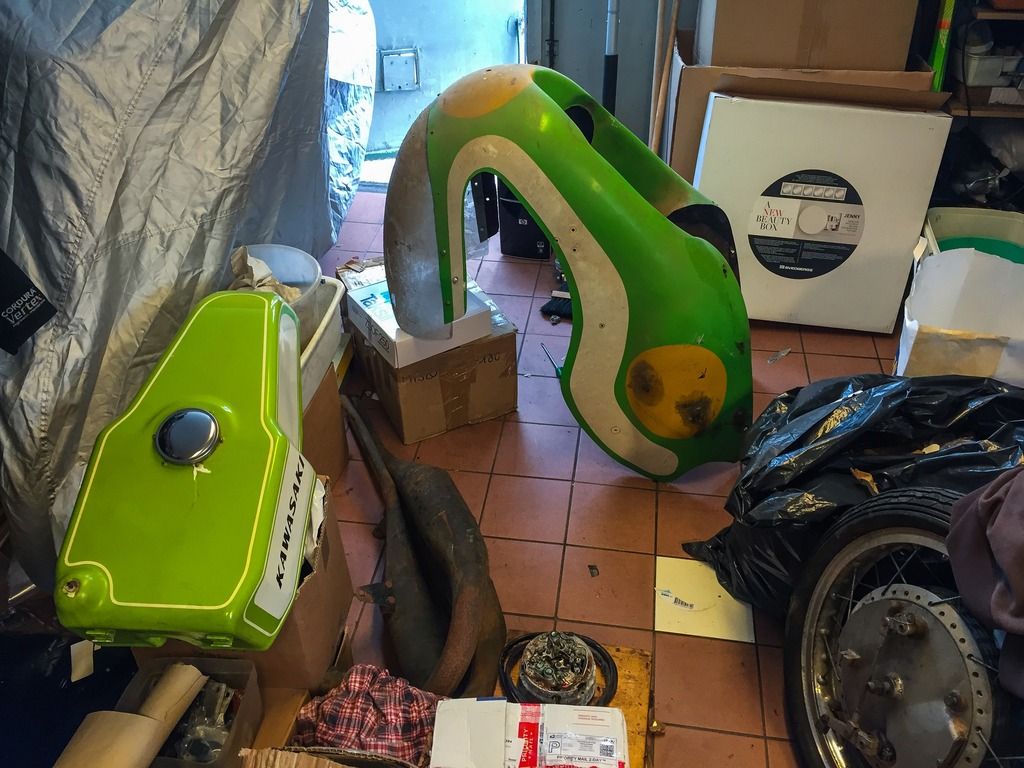
Belly fairing.
|
Janne W. is very keen on having both our fairings sent off to Johnny´s mc-lack be painted. He is more ready with his bike. He has owned it for 4-5 years and I can understand his eagerness to get it finished. Actually that suits me fine. I also need to get things done! So, I left my fairing parts to our plastic guy, Ingvar, here in Stockholm. I need to get my fairing repaired here and there and also have the parts fit together better than they did when I bought it. Ingvar is extremely good with plastics and fairings. He has done many for Janne during the years. Yamaha TZ:s mostly. Now it´s time for two H1R:s at once!
 |
| Fairing off to be repaired. |
As the fairings are gone for a while, there´s extra space in the garage right now. That´s going to come in handy tomorrow when the frame comes back home and also for another bike. We just bought one for our daughter, Wilma, to train on. She´s going to take here motorcycle driving license this spring and we´re starting soon. A Kawasaki of course, Z300. Nice little street bike with low weight and easy to drive. ABS brakes and nice handling! It´s going to be great fun!
 |
| Happy daughter! |
Busy days ahead as you can see...
I´m hoping all comes together nicely in my small garage. Space is a serious problem! My BMW 1200GS, William´s Honda Transalp, Wilma´s Z300 and the H1R.
The new bike will arrive tomorrow as will the H1R frame. We´ll see how that plays out. Later tomorrow I´m off to Copenhagen for another couple of sessions in the simulator.
Wish me luck...
/Per


Good Luck Per! :-)
SvaraRaderaThanks! I may need it.... ;-)
SvaraRadera