I write these first lines of this post after I completed it. It is a long post, probably the longest so far... But that might actually be sort of appropriate since this is a small anniversary.
It is my 50th post in the blog!
Thanks to you all for reading and I sure hope this one will be as interesting as the older ones.
Enjoy!
I finally had the energy to get down to business with the carburetors and getting them cleaned up and refurbished and on to the bike. I did a halfhearted try to clean one of them a while ago but the way the engine looks now made that effort very insufficient. I had to do it all again, much more thoroughly, and do it to all three this time.
I´m having problems with the bike getting too nice... I want it to look used and raced with. OK, the carbs won´t get that ruined after 4-5 races, but a few stains and some imperfections just add to the authenticity of my restoration. Difficult decisions when you can get everything looking brand, spanking new, easier and with less effort!
Remember I rushed ahead and bought an extra set of carbs? Yeah, too eager for my own good at times. Anyway, they arrived, but not as safe as I would have liked...
 But first, as I promised last time... A picture of my stash of POL polishing compound. Yeah it´ll last for a while. 7 tubes and 2-3 ordinary Autosol polish tubes as well. I should manage. :-)
 And here´s the set of carbs from my friend in Belgium.
I won´t be needing these after all, and that is actually quite good, since they aren´t a complete set and one of them got damaged during transportation.
The originals are stamped R, L, and C on the surface of the air intake in order to tell them apart. My originals are one of each, these were not, 2 L:s and one R I think. They also lack the cable adjusters on top of the lids, not a big deal since they are readily available on eBay.
Too bad, one of them got damaged and suffered a broken fuel inlet in the box during shipping. I´ll try to fix that over time, but for now they are tucked away...
 Lets start working on the ones I will be using. Time to get dirty!
I disassembled all three of them and stored every carb in its own plastic jar. I wanted to keep them together so all parts belonging to a specific carburetor gets back to precisely that one. Most important with the throttle slides that might have developed some wear that could make them not fit perfectly in another carb body. I Might be superstitious, but I prefer not to take any chances.
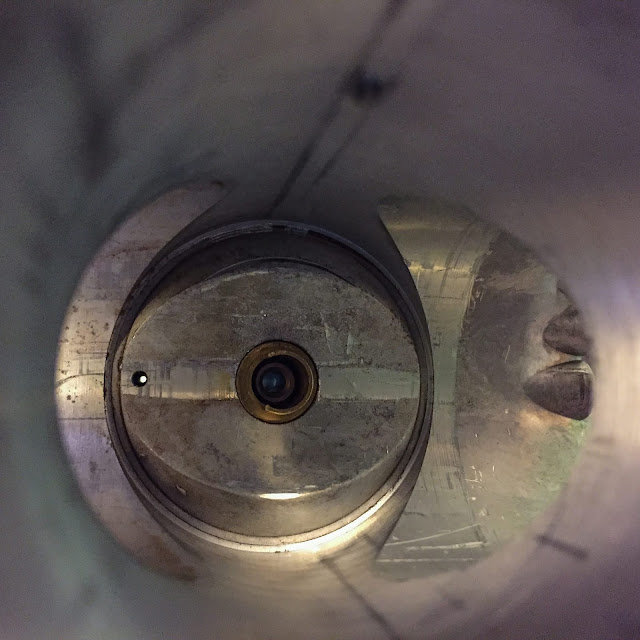
 Lots of grime and dirt on the outside and even more on the inside. Look at the color of that air screw. Quite greenish. I believe it´s called "verdigris" in English. The color copper and brass get when exposed to the elements. It looks nice, but not here on my racing carb...
 And this wasn´t too bad, really. Still oily and sticky. Far better than crystallized fuel and really gummy two stroke oil. This was actually an easy clean. Yay!
I could also save a couple of the gaskets. They will enter my spare parts box, since I got new ones to put in the carbs when that time comes. I also thought it was real strange to see different sizes of main jets in all the carbs. Odd, but the solution to that mystery turned up later...
 The first part of the cleaning process is getting rid of all grease, dirt and small particles on all parts and surfaces.
white spirit, Lacknafta, in Swedish, does the trick just fine. I just let the parts soak in it for a while, use a soft brush to clean dirt and grease off and then rinse in lots of really hot water.
 The bigger parts get to lay in the solvent overnight. Be careful not to put rubber parts in it! They tend to get enlarged and ruined if left too long in white spirit. Rubber parts are cleaned with soap and hot water and then treated either with rubber grease or my other favorite, Armour All.
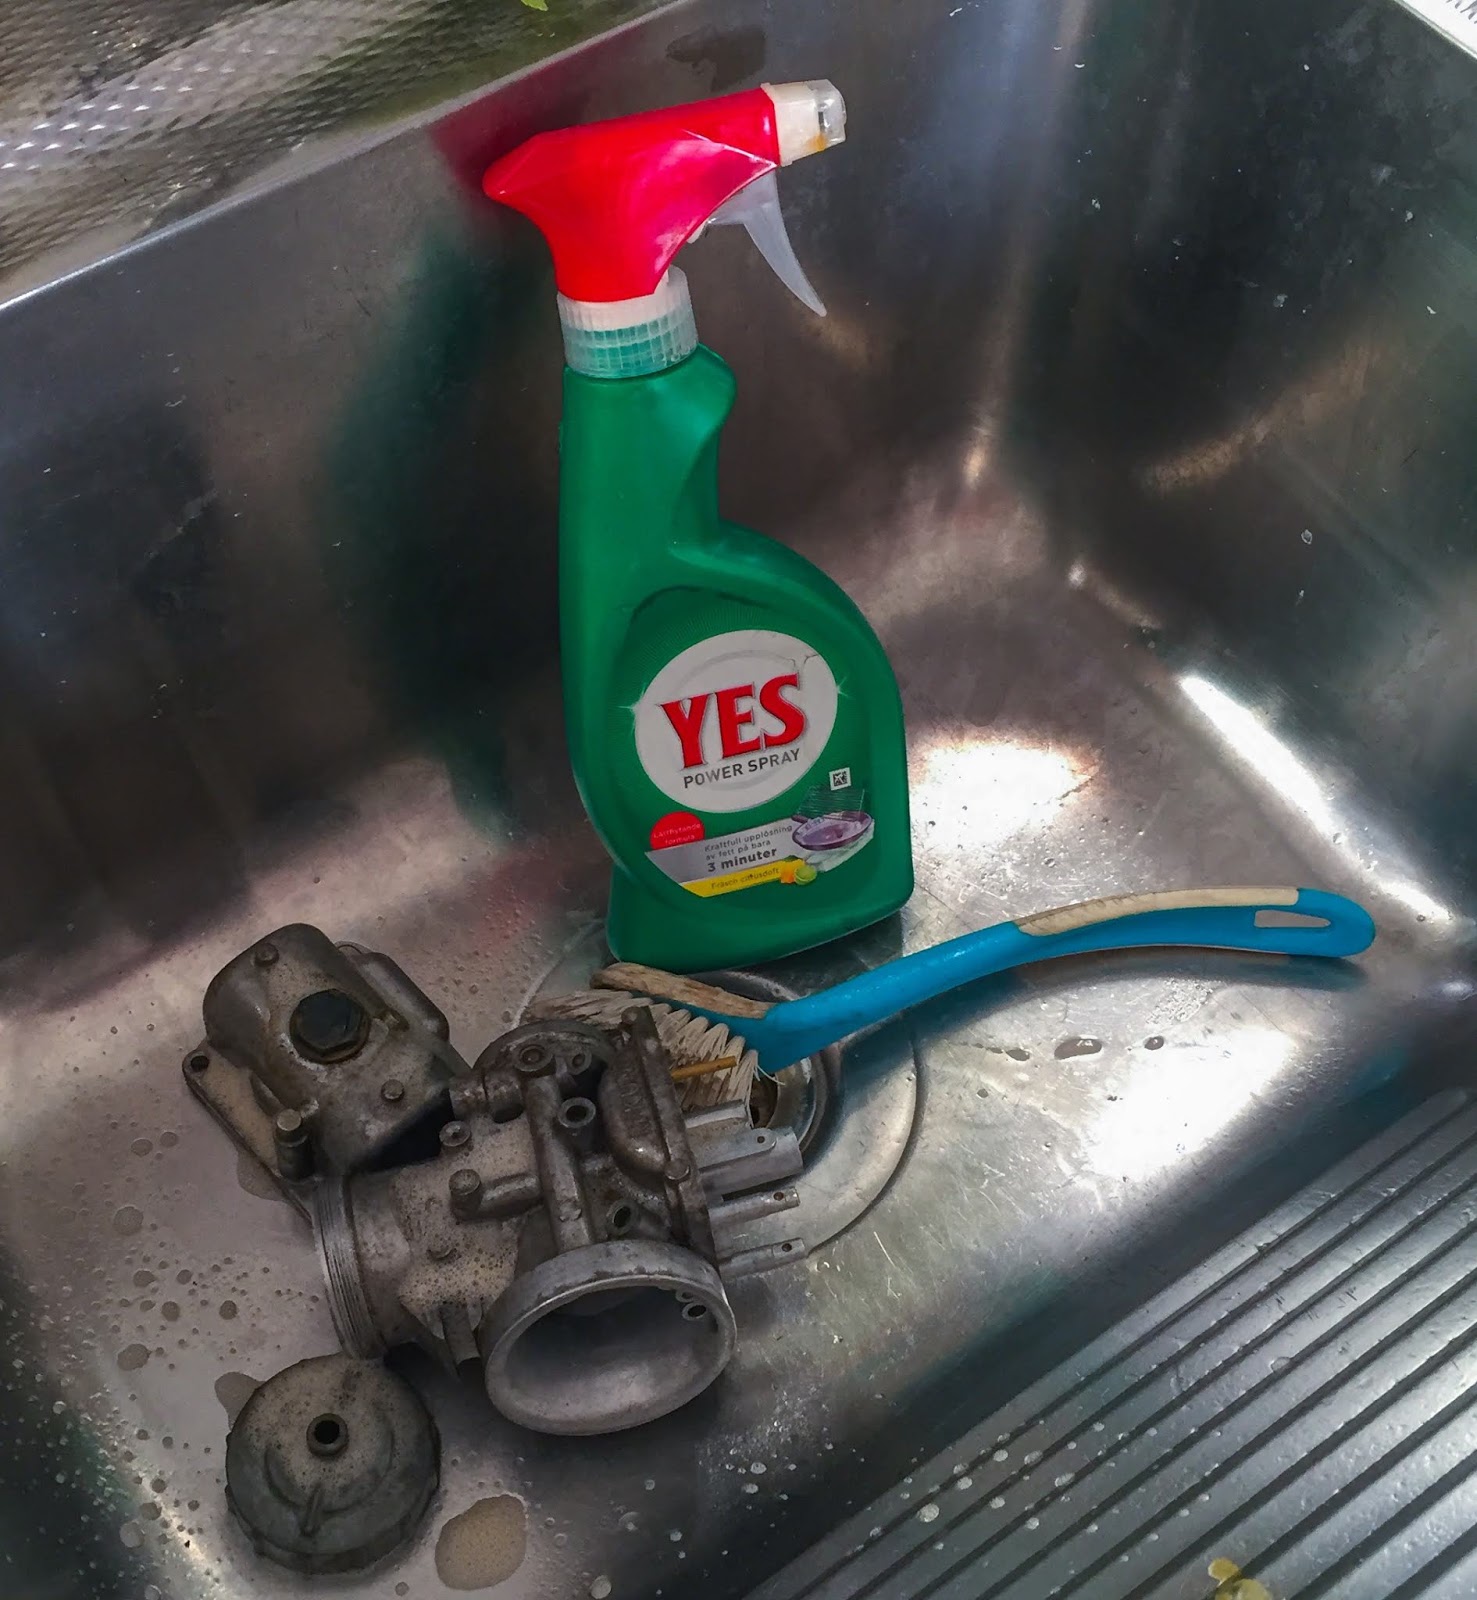
 Because the next step in the cleaning process is very sensitive to grease of any kind on the parts I prefer an extra stage here. Yes Powerspray is a strong solvent used in every household here in Sweden to clean pans and skillets. Super tough also on white spirit and other grease left overs. It leaves a surface clean of oil and grease AND the white spirit. That´s needed for the next step. I´m Lucky I can do this kind of cleaning when my darling wife is at work. This is part of our laundry room in the basement of our house. Yeah, I cleaned it thoroughly when i was done!
 And when all three are pre cleaned this way and sit in their respective jar it is time to move on to the heavy duty stuff.
 I know it is risky and a bit dangerous, but the results are worth the risk. I use a solution of 30% Phosphoric acid and hot water to get the surface of my parts as new. The acid removes corrosion and pigmentation changes in the aluminium and also penetrates deep inside all channels, crevices, nooks and crannies of the carb bodies and parts.
 It is of vital importance to keep moving the parts all the time in the acid bath. 30 sec of laying still can produce black marks in the surface that are very hard to remove. I let the parts lay in the acid for a maximum of 2-3 minutes and constantly move them around in the acid. If you leave them longer the risk for hydrogen embrittlement increases drastically and you don´t want that in your precious carbs. I´ve been planning to get an ultra sonic cleaning machine for ages, but have never gotten around to do it. This method works as well, just means a whole lot more manual work.
 Acid is acid, even at a rather weak concentration so I use safety goggles and acid proof gloves during this process. Not my best selfie, but here you go!
 A big bucket of hot water is perfect for rinsing off the acid and getting the etching process stopped before rinsing it under hot running water. You can see how gleaming clean the parts get from using the acid. Be sure to take care if you decide to try it, though.
 And here they are. Three H1R carbs in their respective ice-cream boxes ready to be assembled and mounted on to the bike. Dirty, smelly and not so fun work, but now it is finally done! I´ve been dragging this long enough. Now it is time for the fun to begin!
 And this is one of them and all its parts laid up for inspection, and a good picture...
I did get new gaskets for the carburetors a while back and figured I should be able to re use all other original parts in them. They all seems to be in good condition and fully usable. Thank God!
Below is a silly little video I made to show what they look like before coming together again. Not much, just for fun....

 We do have a very old and genuine Mikuni agent here in Stockholm. They are even called "StiBo motor, Mikuniagenten" and have been around since 1967... That´s more than 50 years, guys! And the same two gentlemen still run it.
This is what I call a genuine environment. They dont´t use creditcards,
don´t have a cash register or those modern electronic payment methods like swish, swipp or whatever they´re called.
 In here "Cash is King" so to speak. You do get a hand written receipt on your purchases, just like in the sixties. No computers, not even a micro fiche reader. Catalogs on paper and old, elsewhere totally forgotten, paper sorting machines for their publications and marketing needs. These old geezers are both very old, a bit grumpy, but very charming if you treat them with some respect.
I went there with one of my carbs to see what parts they could supply for an H1R. It is actually fully possible they sold stuff for this bike in the seventies. Maybe even to "Esso" or Björn.
 They do get a lot of criticism on the internet for being rude and ignorant.
Yeah, a 25 year-old race biker or motocross guy might not be able to manage these guys. I find them extremely charming and their business well worth a visit. Best is to call in advance to make sure they are on location and ready to see you. If you ask humble questions and listen to what they say instead of argue your own opinion you will get superb service and good original Mikuni parts at a reasonable prize. Of course you can find stuff cheaper via the net, but then you wouldn´t get to meet them, would you?
 Here´s thefind of the day. 3 more gaskets and also 3 float valves. We discussed what kind of valve would fit. I told them the Kawasaki part number and we compared what I had in my carbs to what they had according to their lists. The gaskets are all good and will fit perfectly. The float valves....? Not so sure, but what the heck, I bought a set just the same. Might come in handy one day!
 To the right here you can see why I´m not so sure about the fitment of their generic Mikuni float valve. The H1R one (Kawasaki numbered) on the right. Two obvious differences.
The size of the float valve itself and also the number of holes, and size, in the brass body. I´m sure you can imagine the difference in fuel flow between the one on the left and the one on the right. Yeah, The H1R doesn´t use petrol, IT DESTRUCTS IT! The evidence is clear here...
 From another angle we can see the difference more clearly. The generic Mikuni one will most probably fit just fine as the measurements seems more or less identical when it comes to threads and height of the body and placement of the float needle.
 Another interesting view. The two float valves compared side by side. The H1R on the right... I seriously hope the old, original ones, will work fine. I think they do look and feel quite alright so I guess they will. They are definitively going back in the carbs.
 So, I ended up spending 150$ US or so on these parts. A bit steep, but I also got to meet the old guys and discuss old times with them. That´s worth a whole lot, to me! The spare float valves will stay in stock. They are the same on modern Mikuni 34mm carbs and possible also then 36:s. One never knows when one might need something like that, right?
 Lets´move on to jetting of the carbs. I said earlier there is a mystery concerning the main jet size of these carbs.
There were quite a few jets included in the sale of the bike and to be honest I hadn´t looked too closely at them just yet. Now I had to find out what to use and if I had it in my stock. If not, I might have to go back to the two grumpy old men also for some more main jets.
I tried to clean my old jets as good as I could to find out what i had. The picture on the right is how I had to do it. The stamps were so small I couldn´t read them, not even with my reading glasses. I used my mobile phone, took pictures of them and zoomed in... Voila!
 I I I I Ii14 jets in all. The funny thing is, they are all different sizes! Not one set of three in the same size... Makes me wonder.
Maybe there was supposed to be two more sets like this in the sale of the bike? Did we miss something in the barn?
Not a big problem. These jets ARE the same sizes used on Mikuni 34mm carbs and I had just been jetting both my own and a friends H2 with these carbs. I have plenty of different sizes in stock and they are easily bought at Mikuniagenten or over the internet.
 Anyway... Here´s another interesting part of the puzzle. The parts manual actually says that the different carbs on the bike takes different sizes of main jets?!
#310 for the Center cylinder.
#320 for the Left hand cylinder.
#330 for the Right hand cylinder.
I can´t figure out why... If there was any kind of logic in this mess, the left one is furthest away from the pump and should (maybe) have the bigger jet? And putting the smallest one in the Center cylinder? Well, beats me!
I do have a plan, though. A good one! Remember I have "Esso´s" racing diary? Yeah, there´s the answer to my problem. I´ll just put in what he used in Anderstorp when he won the Swedish GP on this bike back in July, 1970. Good plan, Eh?
 And here it is... Just like in the parts manual.
Left: #320
Center: #310
Right: #330
Now that I have it up here lets look closer at it. The final note of this entry in the diary says:
"I was the first to win a Grand Prix 500cc in Sweden since 1934"
We can also see he received 300 SEK for winning the race... and that he beat Ginger Molloy, 2nd and Marzovsky, 3rd while destructing 32 liters of gas during 30 laps. I can surely see why those large float valves were needed!
 Well now... Everything is all set for assembly of the carburetors. Lets just do it! First thing to go in there is the pilot jet. This little bugger supplies the engine with just enough fuel to keep it running on idle with the throttle slides closed, or almost closed. Air is routed through the carb body beside the throttle slide and mixes with the fuel from the pilot jet just in front of the needle jet in the middle of the venturi. The size of the pilot jets are #60, to be compared with the 200:s and 300:s on the main jets.
 Next is the needle jet, the brass tube that receives the needle from above and houses the main jet at the bottom. It is in this part the amount of fuel going in to the engine is determined while on 1/5 to 4/5 of throttle opening (approx). There´s a small slit in the jet needle that fits on to a small tab further down in the tube. Easy does it when putting these parts in place.
 The needle jet now in place and the small, now very clean, pilot jet fuel canal clearly visible just in front of the needle jet seat. It is easy to understand how easily these small crevices clog up.
 While holding the needle jet in place I can put the small washer in place beneath the main jet.
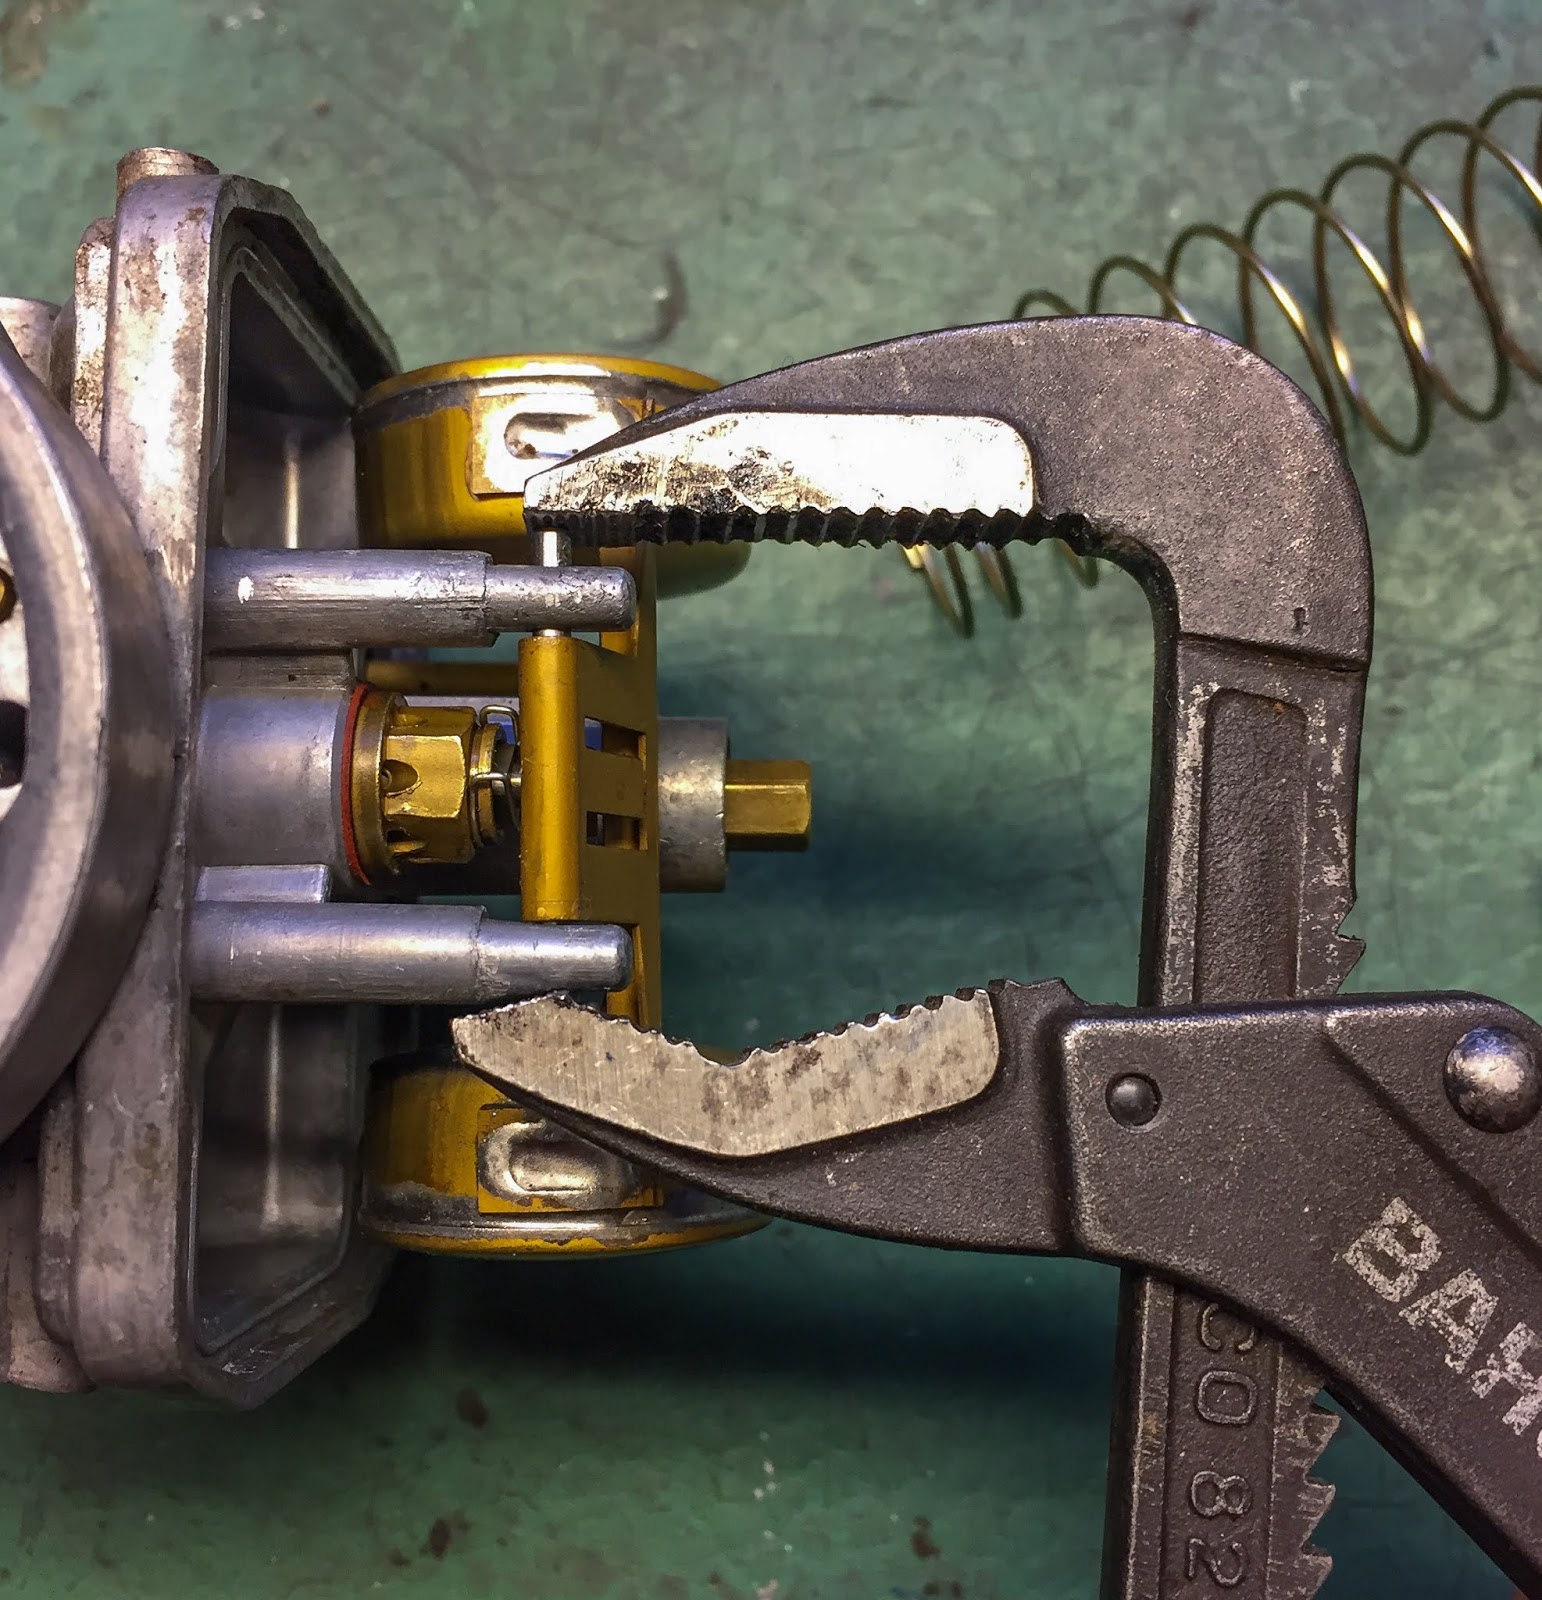
 The main jet is finally secured with a fixed wrench in the correct size. The jet is pulled tight, but not too tight. Brass and aluminium are both soft metals and require a bit of carefulness.
 Next is that wonderful, original, float valve with its retaining spring and fiber gasket. Same here. Brass and aluminum and a fiber gasket on top of that. Not too tight, but tight enough to keep it in place!
 Getting the float in place, correctly attaching to the float valve is tricky. Street bikes have a simpler way to do this. Just put it on top of the float valve and you´re good. Here it is much more securely attached by an extra brass piece on the float gripping the float valve.
 The float is secured to the carb body by the float pin. This little thing is pushed through holes in the two small "towers" on the carb body next to the float. It creates a "hinge" for the float to move around and do its job. It can be very tricky to remove a stuck float pin and also very tricky to get it in place if the holes are ever so lightly deformed in any way. Never, ever use a hammer to beat on the pin and directing the force on to these towers... They WILL brake! And that carb body is more or less ready for the bin. Easy does it here!
 Here´s how I do it. Carefully squeeze the pin in place by applying force on the pin and the receiving "tower". The pin usually gets stuck in one of them so put it through the other one first and then force it in to the tight one.
 Now is the time to also check the float level. According the manual it´s supposed to be 34,5 +/- 1mm from "front bore center". I guess that is something they want me to check towards the actual fuel level in the float chamber. I can´t do that now, nor will I ever do it that way either.
IF I would find the need to get it THAT exact I would do it in a see-through bowl and rig a bottle of fuel to the fuel inlet of the carb, have the carb sit at the bottom of the bowl without the float bowl attached and simply fill the carb, and the glass bowl, until the float valve stops the fuel from running into the carb. I will by then clearly see the float level in the bowl.... Yeah, I know, it sounds very theoretical, but it works!
For now the floats end up where they were. Approximately with the retaining part of the floats parallel to the gasket surface. That usually works just fine!
 The air screw is next. Cleaned and with its retaining spring. This one is screwed all the way in and then opened 1/2 turn. That sounds a bit too little in my ears, but I´ll try it for now. The street bikes use 1 1/4 - 1 1/2 turns out. We´ll see how that plays out when I start her up!
 Time to move up in the world. One of the most important pieces in the carb is the throttle slide. It holds the jet needle and that in turn is adjusted in height by a small circlip that holds the needle at a precise height in the slide. I use the standard setting of the middle groove of the five available. 3rd groove from the top and bottom!
 The needle in turn is held in place by the throttle valve spring seat. A washer with a hole and a tab that secures the needle in place when the large slide spring puts pressure on it. It also locks the throttle cable in place by blocking the path for it to the larger release hole. Quite ingenious actually!
 The spring is rather large and slinky, as you can see here. The slide also uses a small slit and tab to be correctly positioned in the body. It is also vital to make sure the needle enters the needle jet at the bottom of the venturi when installing the slide and the spring.
 The final touch is putting the carb body top lid on and screw it to the body. OK, that´s one down, two more to go! Nice, clean and super easy job once everything is clean and neat.
 Now, I wouldn´t be me without a few "still leben" pictures of the parts I´ve just worked on, would I?
Here we go... Nicely cleaned and refurbished carbs for the H1R racer.
 And from another angle. I believe these will work just fine. Let´s keep our fingers crossed for the float valves to be leak proof! Everything else on these carbs will work perfectly, I´m sure.
I made another short video... And again, just for fun.

 Getting ready to go on the cylinders. This is a wonderful set of carbs. I spent many hours cleaning, working on and finally assembling them to this great condition. I´m very happy with the result so far.
 One more, just to show how big those air inlets are. One of the slides have some small marks and shows a little wear, but I hope
it´ll work out.
 This is where they all go, later on. Everything is prepared at this end for the carbs. The cables are routed out of the way for them and the protective blocking of the intakes removed. You can also see how the clutch cable has no adjustment available as the street bikes do. There was a damage on the sheath which I repaired with some black shrink tubing. Looks OK, but absolutely not perfect. It´ll do for now.
 Side view of the air intake rubbers and their clamps. I know these aren´t original Kawasaki, but I don´t mind. They were available and they look the part! Even clamps are OK in my world.
The oil lines with their one-way-valves, check valves, are also clearly visible here. Those will be among the items to be tested during the first start up. It is vitally important that oil flows in all three lines at an even pace. If one of those check valves doesn´t work properly, the oil won´t flow to that cylinder, OR only flow there. They need to keep the exact same pressure in all three in order to function perfectly. More about that later.
 Here´s another one of my small tricks. I use a food grease in a spray can as lubricant when mounting tight rubber parts. It is, since it is approved for food, totally harmless to rubber parts. It is tempting to use automotive grease, but that will ruin many rubber parts. There are other products out there, but I really like this "Tarant" thing...
 All three in place. A bit tight to get them in there, especially towards the engine casing. Not much clearance there! The H1R carbs have these "hooks" above the air intake part. They are for adjusting their position in the intake rubber. You want all carbs to be mounted correctly both vertically and horizontally. These Are used for that.
 A rear brake rod from an H2/H1 fit snugly in the hooks and made it easy to adjust the carbs correctly before tightening the clamps and mounting them permanently to the engine. Next up with the carbs are the cables. Throttle and choke. That´ll have to wait for a while....
I asked you in my last post about someone that could copy my fuel tank. Well, I got an answer!
A kind reader tipped me about a business not too far from Stockholm that might be able to help me. Thanks a lot!!
 I wrote to him via his homepage and he called me right back and we discussed what I needed and what he could do.
So, before continuing on something else, I started preparing for a quick trip to this guy.
He is going to make me a copy of the tank in aluminium! The name of his business is "Alucars" and that sounds just right to me. He resides in Hällestad just west of the city of Norrköping approx 200 km south of Stockholm.
 What I´m doing here is planning for a Pingel high-flow fuel petcock on the aluminium tank. As you can see the Pingel will be slightly larger (higher) than the original one and drop the fuel outlets a bit lower compared to the stock fuel tap. My plan here is to raise the bottom of the copied surge tank about an inch so that the bottom of the tank will be flush with the lower end of the frame tube. This way the fuel outlets will be at the same height compared to the carbs. You can see my pencil markings on the tank.
 I´m really happy to have found this guy, Bert Svensson, is his name, by the way. He´s the kind of guy that seem to be able to fix most anything. A fuel tank absolutely was no problem. The easiest and best way to do this was to get the tank to him ASAP. These pictures were taken to show him how easy, or difficult, it would be to copy the thing.
 - " Nah, that´s no big deal. You need that indentation to reinforce the top of the tank"
That is what he said when I suggested he could move the fuel cap further up front and leave the topside of the tank smooth. That´s what you want to hear! That means he´s a gut that knows his business. I sure did look forward to meet Bert and discuss this job.
 The bottom of the tank. He´ll copy it exactly and also make small reinforcements to fasten the hooks for the rubber fasteners both up front and at the rear end of the tank.The only difference will be the small surge tank where the fuel tap is located.
It´ll be a bit more shallow.
 Bert will have no use of the stock petcock at all so I´ll just remove it and keep it at home. That way I can work on it. It is, of course, stuck.... Does anyone of you, my dear readers, know if there´s a rubber seal in these things or is it a metal to metal seal in it?
 Fuel petcock off the tank. This gasket will be easy enough to copy when the time comes. Here we can also note that this petcock bracket has been replaced or at least removed some time. Those straight screws are NOT original H1R... I sure would like to know if my tank is an original Kawasaki item or if it is a copy made during its racing days...
 Before I went to Hällestad I asked him if he could help me with my expansion chambers as well... He sure could!
- "Bring them and I´ll have a look"
So, a couple of days ago, I took the journey south and left my precious tank and two of my chambers in the hands of Bert. I must admit, I´m a bit nervous, but I need to trust people in this process.
I think we all can agree that the tank is in good hands considering the door panels he was working on in front of the tank in this picture. Now all I can do is wait... I hope these parts will be done in a reasonable amount of time. Not that I´m in any hurry, but I need to continue working on the bike and without the exhaust system and the tank it is difficult to start working on the fairings.
Well, there´s lots of other stuff to do, for sure! I can start by putting cables on it, fixing the electrics, getting some nice high tension cords and spark plug caps etc, etc.
Stay tuned for more. Maybe not as frequently as the last 3-4 weeks, but I´m at it again. The bike and the restoration process is on my mind most every day now, so progress will continue. I promise!
Thank you for reading.
/Per
It is my 50th post in the blog!
Thanks to you all for reading and I sure hope this one will be as interesting as the older ones.
Enjoy!
I finally had the energy to get down to business with the carburetors and getting them cleaned up and refurbished and on to the bike. I did a halfhearted try to clean one of them a while ago but the way the engine looks now made that effort very insufficient. I had to do it all again, much more thoroughly, and do it to all three this time.
I´m having problems with the bike getting too nice... I want it to look used and raced with. OK, the carbs won´t get that ruined after 4-5 races, but a few stains and some imperfections just add to the authenticity of my restoration. Difficult decisions when you can get everything looking brand, spanking new, easier and with less effort!
Remember I rushed ahead and bought an extra set of carbs? Yeah, too eager for my own good at times. Anyway, they arrived, but not as safe as I would have liked...


I won´t be needing these after all, and that is actually quite good, since they aren´t a complete set and one of them got damaged during transportation.
The originals are stamped R, L, and C on the surface of the air intake in order to tell them apart. My originals are one of each, these were not, 2 L:s and one R I think. They also lack the cable adjusters on top of the lids, not a big deal since they are readily available on eBay.
Too bad, one of them got damaged and suffered a broken fuel inlet in the box during shipping. I´ll try to fix that over time, but for now they are tucked away...

I disassembled all three of them and stored every carb in its own plastic jar. I wanted to keep them together so all parts belonging to a specific carburetor gets back to precisely that one. Most important with the throttle slides that might have developed some wear that could make them not fit perfectly in another carb body. I Might be superstitious, but I prefer not to take any chances.


I could also save a couple of the gaskets. They will enter my spare parts box, since I got new ones to put in the carbs when that time comes. I also thought it was real strange to see different sizes of main jets in all the carbs. Odd, but the solution to that mystery turned up later...

white spirit, Lacknafta, in Swedish, does the trick just fine. I just let the parts soak in it for a while, use a soft brush to clean dirt and grease off and then rinse in lots of really hot water.


I did get new gaskets for the carburetors a while back and figured I should be able to re use all other original parts in them. They all seems to be in good condition and fully usable. Thank God!
Below is a silly little video I made to show what they look like before coming together again. Not much, just for fun....

This is what I call a genuine environment. They dont´t use creditcards,
don´t have a cash register or those modern electronic payment methods like swish, swipp or whatever they´re called.

I went there with one of my carbs to see what parts they could supply for an H1R. It is actually fully possible they sold stuff for this bike in the seventies. Maybe even to "Esso" or Björn.

Yeah, a 25 year-old race biker or motocross guy might not be able to manage these guys. I find them extremely charming and their business well worth a visit. Best is to call in advance to make sure they are on location and ready to see you. If you ask humble questions and listen to what they say instead of argue your own opinion you will get superb service and good original Mikuni parts at a reasonable prize. Of course you can find stuff cheaper via the net, but then you wouldn´t get to meet them, would you?


The size of the float valve itself and also the number of holes, and size, in the brass body. I´m sure you can imagine the difference in fuel flow between the one on the left and the one on the right. Yeah, The H1R doesn´t use petrol, IT DESTRUCTS IT! The evidence is clear here...


There were quite a few jets included in the sale of the bike and to be honest I hadn´t looked too closely at them just yet. Now I had to find out what to use and if I had it in my stock. If not, I might have to go back to the two grumpy old men also for some more main jets.
I tried to clean my old jets as good as I could to find out what i had. The picture on the right is how I had to do it. The stamps were so small I couldn´t read them, not even with my reading glasses. I used my mobile phone, took pictures of them and zoomed in... Voila!

Maybe there was supposed to be two more sets like this in the sale of the bike? Did we miss something in the barn?
Not a big problem. These jets ARE the same sizes used on Mikuni 34mm carbs and I had just been jetting both my own and a friends H2 with these carbs. I have plenty of different sizes in stock and they are easily bought at Mikuniagenten or over the internet.

#310 for the Center cylinder.
#320 for the Left hand cylinder.
#330 for the Right hand cylinder.
I can´t figure out why... If there was any kind of logic in this mess, the left one is furthest away from the pump and should (maybe) have the bigger jet? And putting the smallest one in the Center cylinder? Well, beats me!
I do have a plan, though. A good one! Remember I have "Esso´s" racing diary? Yeah, there´s the answer to my problem. I´ll just put in what he used in Anderstorp when he won the Swedish GP on this bike back in July, 1970. Good plan, Eh?

Left: #320
Center: #310
Right: #330
Now that I have it up here lets look closer at it. The final note of this entry in the diary says:
"I was the first to win a Grand Prix 500cc in Sweden since 1934"
We can also see he received 300 SEK for winning the race... and that he beat Ginger Molloy, 2nd and Marzovsky, 3rd while destructing 32 liters of gas during 30 laps. I can surely see why those large float valves were needed!


IF I would find the need to get it THAT exact I would do it in a see-through bowl and rig a bottle of fuel to the fuel inlet of the carb, have the carb sit at the bottom of the bowl without the float bowl attached and simply fill the carb, and the glass bowl, until the float valve stops the fuel from running into the carb. I will by then clearly see the float level in the bowl.... Yeah, I know, it sounds very theoretical, but it works!
For now the floats end up where they were. Approximately with the retaining part of the floats parallel to the gasket surface. That usually works just fine!


Here we go... Nicely cleaned and refurbished carbs for the H1R racer.

I made another short video... And again, just for fun.


it´ll work out.


The oil lines with their one-way-valves, check valves, are also clearly visible here. Those will be among the items to be tested during the first start up. It is vitally important that oil flows in all three lines at an even pace. If one of those check valves doesn´t work properly, the oil won´t flow to that cylinder, OR only flow there. They need to keep the exact same pressure in all three in order to function perfectly. More about that later.


I asked you in my last post about someone that could copy my fuel tank. Well, I got an answer!
A kind reader tipped me about a business not too far from Stockholm that might be able to help me. Thanks a lot!!

So, before continuing on something else, I started preparing for a quick trip to this guy.
He is going to make me a copy of the tank in aluminium! The name of his business is "Alucars" and that sounds just right to me. He resides in Hällestad just west of the city of Norrköping approx 200 km south of Stockholm.


That is what he said when I suggested he could move the fuel cap further up front and leave the topside of the tank smooth. That´s what you want to hear! That means he´s a gut that knows his business. I sure did look forward to meet Bert and discuss this job.

It´ll be a bit more shallow.


- "Bring them and I´ll have a look"
So, a couple of days ago, I took the journey south and left my precious tank and two of my chambers in the hands of Bert. I must admit, I´m a bit nervous, but I need to trust people in this process.
I think we all can agree that the tank is in good hands considering the door panels he was working on in front of the tank in this picture. Now all I can do is wait... I hope these parts will be done in a reasonable amount of time. Not that I´m in any hurry, but I need to continue working on the bike and without the exhaust system and the tank it is difficult to start working on the fairings.
Well, there´s lots of other stuff to do, for sure! I can start by putting cables on it, fixing the electrics, getting some nice high tension cords and spark plug caps etc, etc.
Stay tuned for more. Maybe not as frequently as the last 3-4 weeks, but I´m at it again. The bike and the restoration process is on my mind most every day now, so progress will continue. I promise!
Thank you for reading.
/Per
En glädjespridare denna blogg. Bra jobbat med förgasarna, du förtjänar lite Sia glass!
SvaraRaderaTack, Larsson! Siaglass ÄR gott! Och lådorna passar fint i garaget.....!
Raderait is Antifreeze coolant here to get into be here for it to get here for it %&^$67547
SvaraRadera