The last rezinked clutch parts went down to Ebbe last Friday and he had them Monday of this week. On Tuesday he started sending pictures of the progress. I was lucky enough to be able to reuse the clutch fibres and steel plates. I have found only two new steel ones but not even one of the 10 fiber ones needed... I´m still looking for new ones!
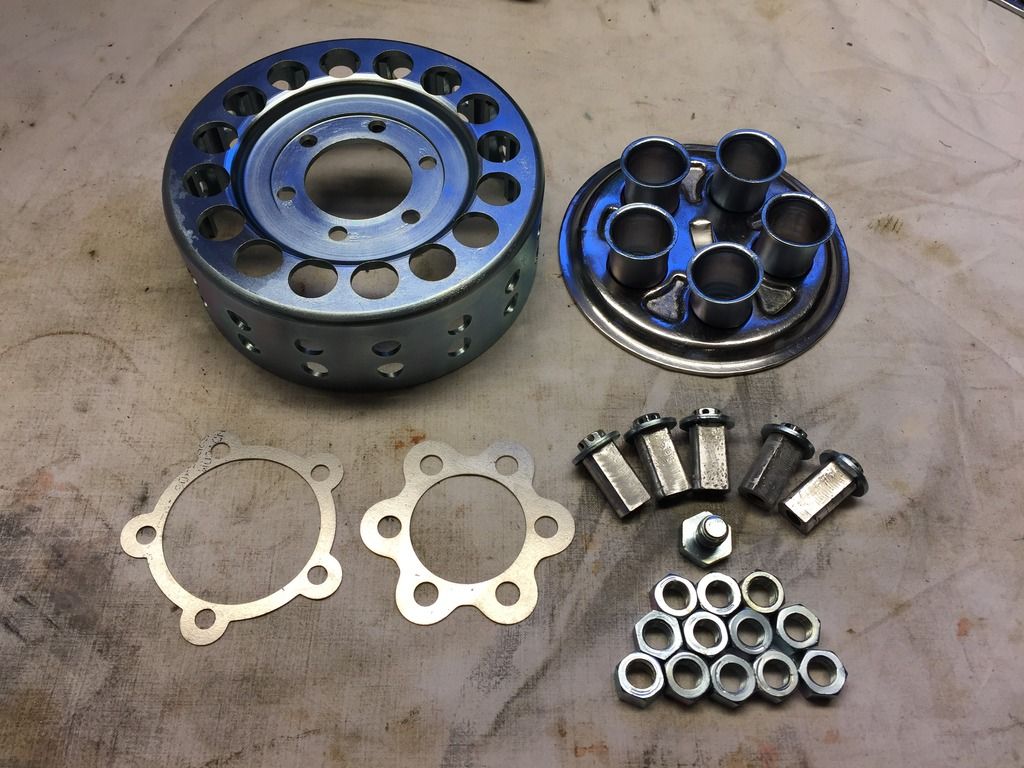 |
| Restored clutch parts. |
We had a discussion about those "lock washers" in the picture. Ebbe is a modern race man and prefers Loctite and steel wire only where absolutely needed. I´m more of an original guy so they went on....
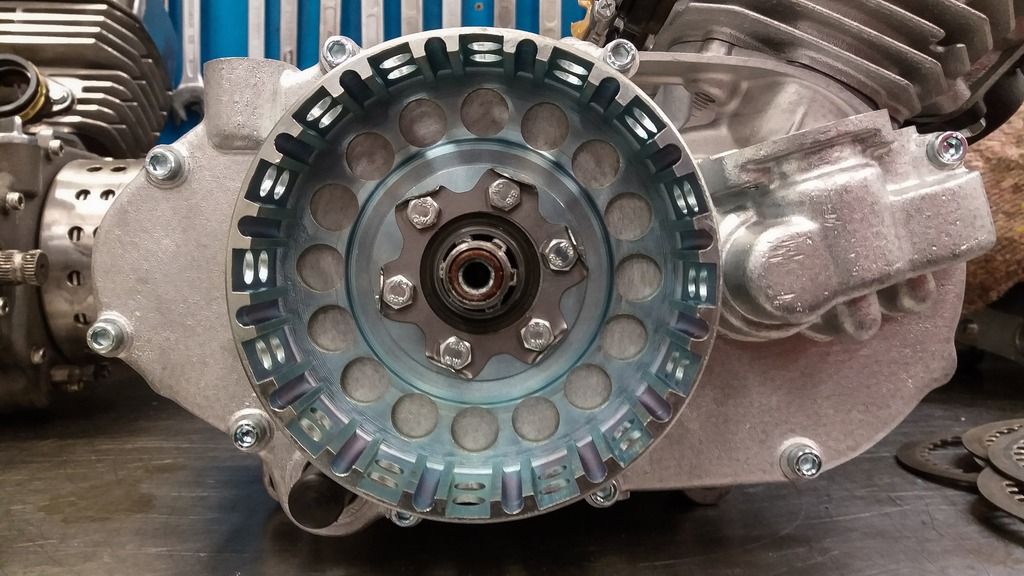 |
| Clutch housing on the engine! |
In this picture you can also se the treated clutch cover... I think it looks great! As I have said about ten times already, I just love the steel ball polishing process! The lock washers fits like a charm even though they are from an H2R. Obviously the same diameter on the shafts and fasteners. I would have preferred original Kawasaki screws, but those were missing, or rather replaced by allen bolts and I don´t want that at all. These will have to do until I have to dismantle the clutch next time. I will also replace the allen bolts on the clutch cover to original pan head screws.
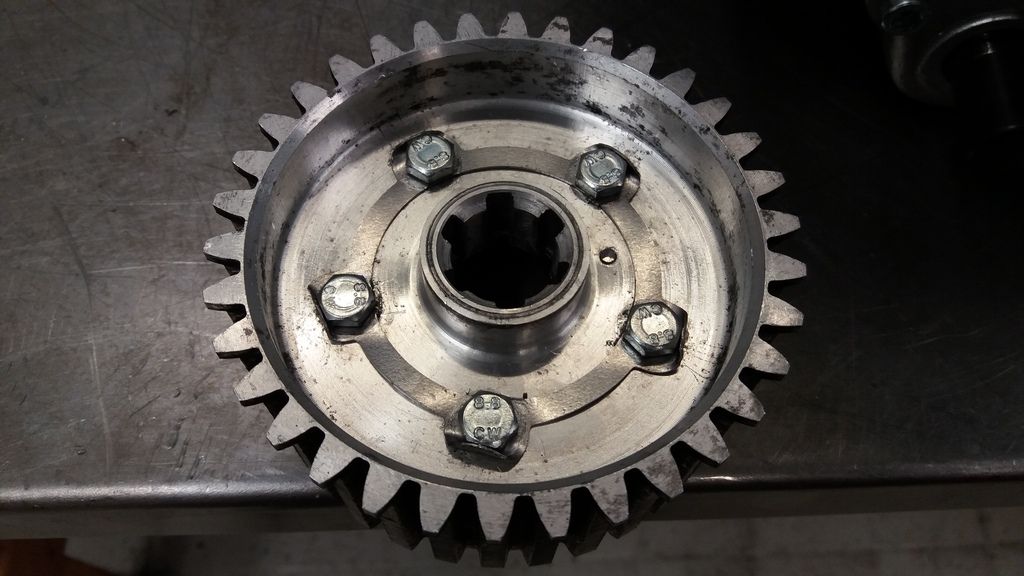 |
| Inner clutch hub. |
The next part coming on is the inner clutch hub. The lock washer here secures the screws that hold the spring guides in place. Luckily also this part was in usable condition. Finding a used or even a NOS one is close to zero.
 |
| The clutch parts reday. |
Not only is Ebbe a superb mechanic, he is also a true estethete, Look at this "still life" grouping of parts! Could be a painting from a famous artist. Note that he mattened the outer clutch plate with glass blasting. Looks a whole lot better to me! It is also possible to understand how the clutch works when you see the fiber plates and the steel ones stacked together in the clutch housing like this. The steel plates grab the inner hub and the fiber ones the outer housing. When the clutch springs press these plates together the crank (engine) is in contact with the transmission. When you pull the clutch lever you press the plates apart and the connection between the engine and the gearbox is lost and you can change gears...A bit of basic theory there, but it looks so clear in this picture.
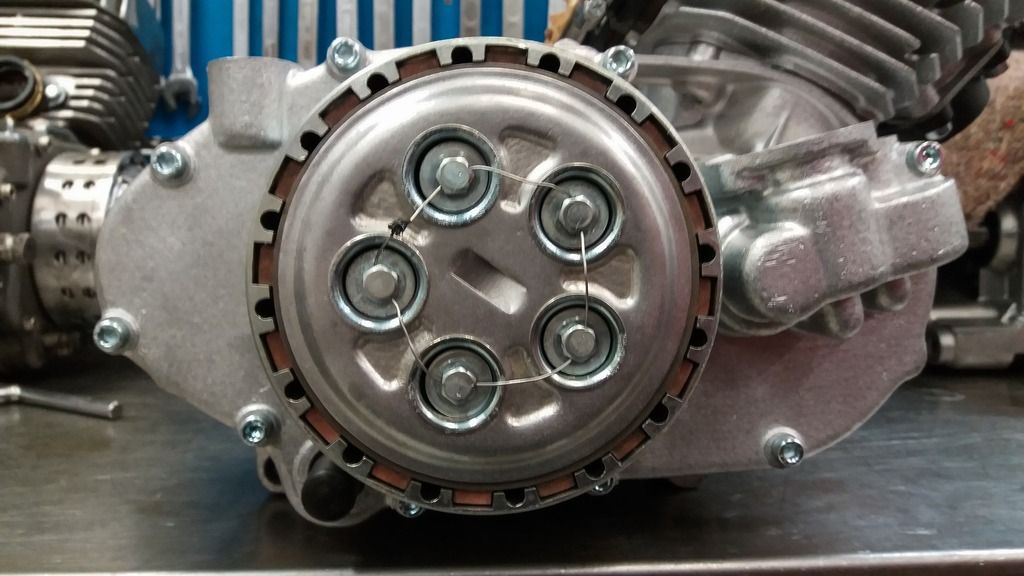 |
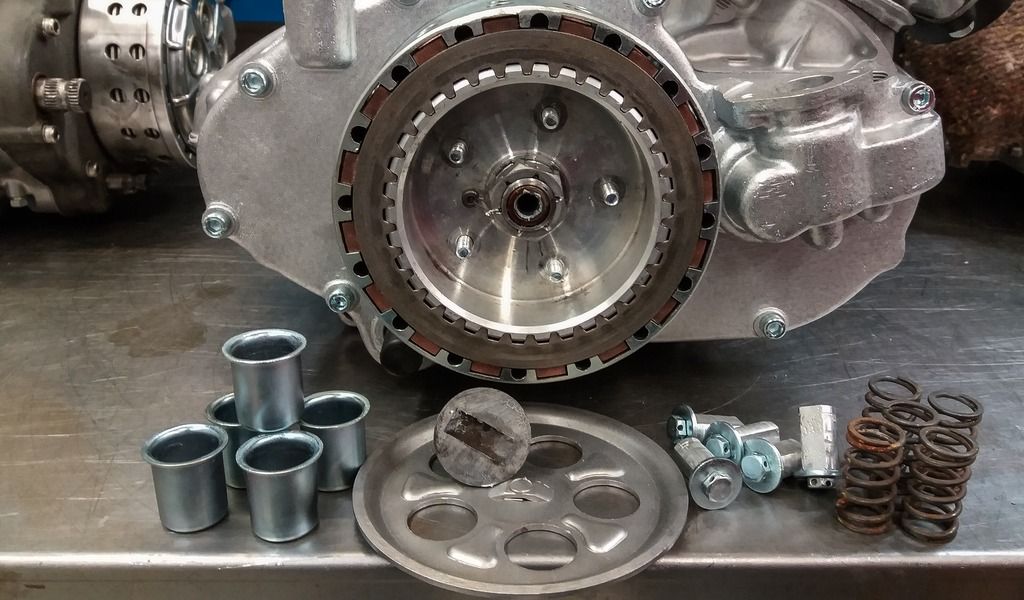
| clutch complete and on the engine. |
I think the outer clutch plate became perfect. Nice matte finish. I´m not sure about the safety wire, though. I believe they used safety wiring here back in the day, but it feels kind of fishy since the clutch needs to move outwards to release. If you put the wiring in place with correct tension I believe the clutch won´t be able to move enough outwards. I´ll probably have to think about this...
This was the status of the engine when I drove down to Malmoe yesterday to pick the it up. I was so stoked during that 6-hour drive. Finally I would see the engine first-hand and get the opportunity to once again shake Ebbe´s hand and thank him for a job well done.
When I arrived he was waiting in his shop with a quirky smile on his face...
- "I had to work on your engine today as well"
- "There was actually an oil leak from that NOS oil seal you sent"
He explained that he had thought the spring in the seal was a bit weak, but it was new! So he put it in and after filling the transmission with oil it slowly seeped out through that oils seal. If that would have happened to me I would have cried and crumbled up in fetal position... But, being who he is, of course he had a solution!
It is not uncommon that oils seals get "sloppy" over time and one way to fix it is tightening the spring a little bit and increase the pressure the spring puts on the rubber sealing "lip". The spring is not made in one piece, but put together from one long spring that is "screwed" together with a, sort of "coned" thread. The picture below shows this.
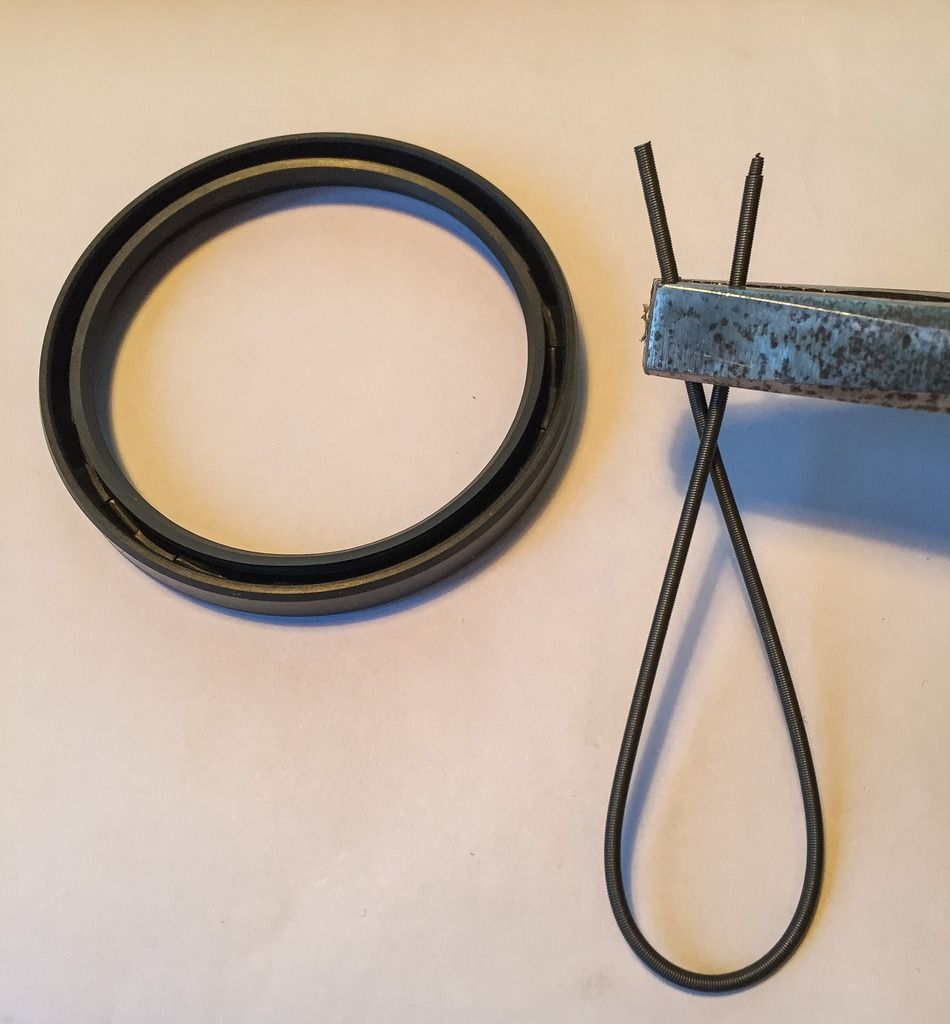 |
| Tightening the spring of an oil seal.... |
It is possible to cut a piece off the "unconed" end of the spring and thus make it shorter. I had no idea about this until Ebbe explained it. Works like a charm! He cut mine by 5mm and that did the trick. A little more pressure on the rubber lip towards the sealing surface and the engine is tight. Phuii...!!
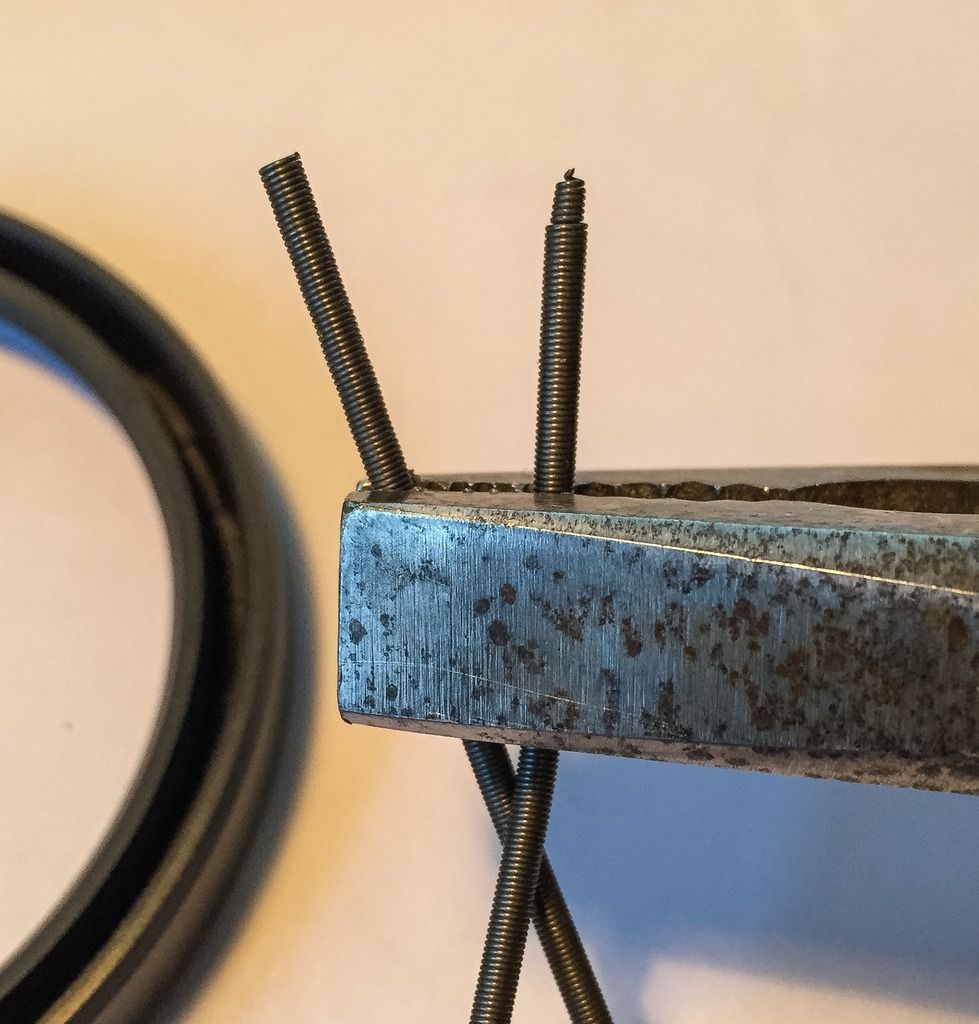 |
| Close.up of the spring. |
The picture above shows a close-up of what I´m talking about. You just have to find the end of the spring and "unscrew" the coned part, cut off a part of the other side and then "screw" the spring back together. This is a technique I´ll be using more in the future.
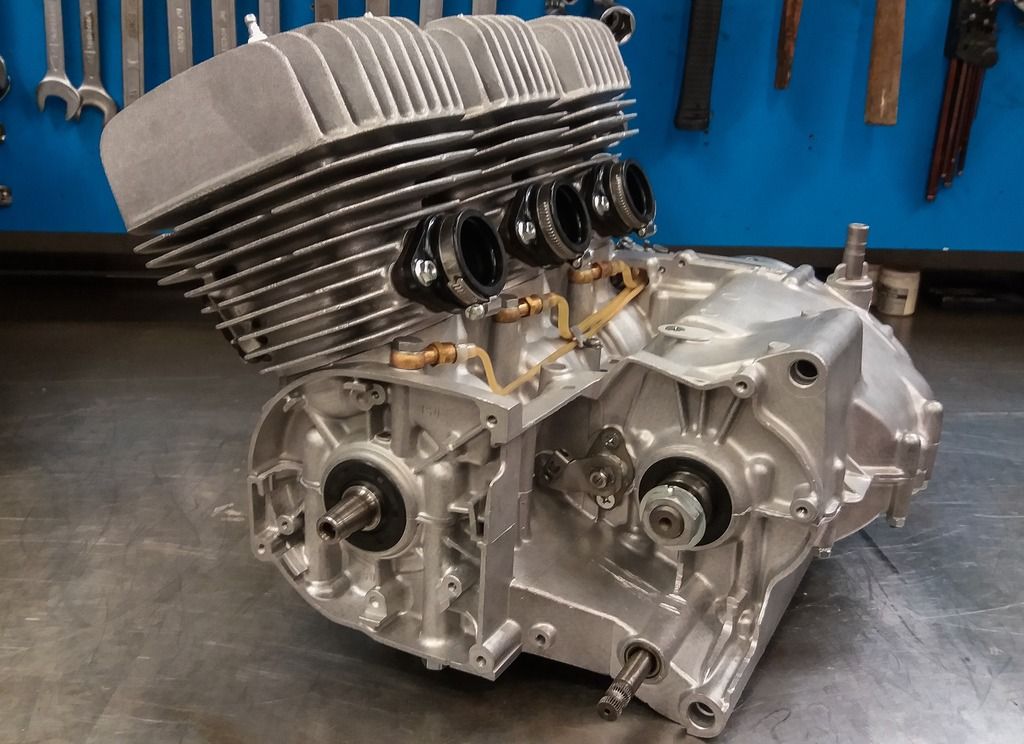 |
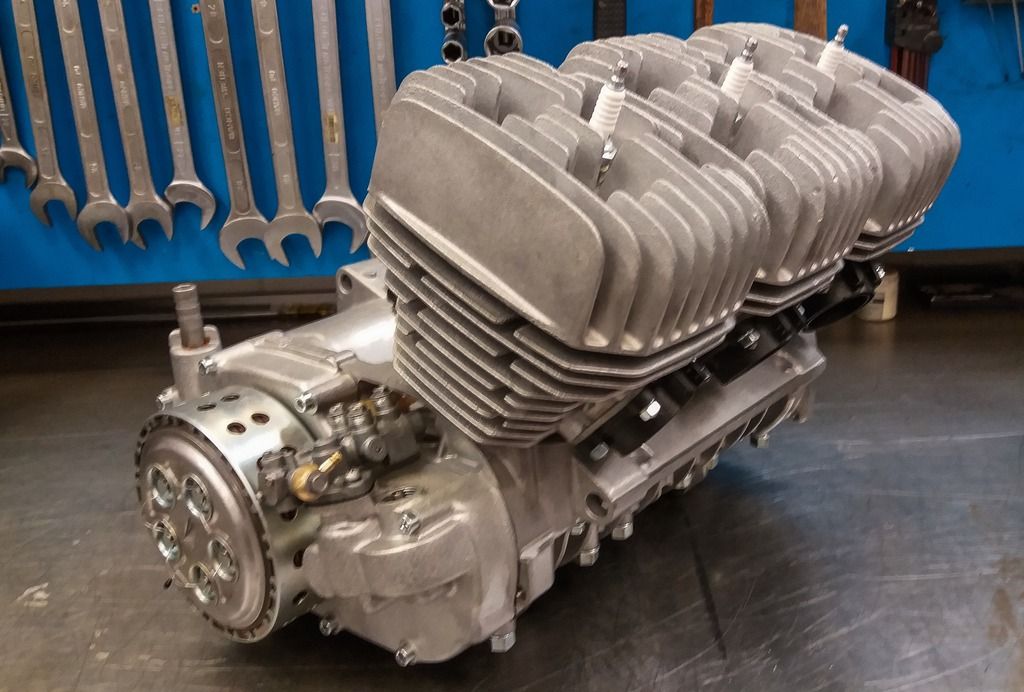
| Ignition and chain side of the engine. |
And here it is in all its glory! The engine completely restored... Ready for the frame and chassis to be finished. Now, I do need to start doing my part of the job. The basement room and the other bathroom are both finished, or at least close to, and I have a Christmas vacation coming up. I sincerely hope I´ll be able to find some time to spend in the garage with the rest of the bike.
 |
| Front side. |
Not a very sharp picture, but it shows the oil pump and the clutch side. The restored exhaust holders and the nice surface.
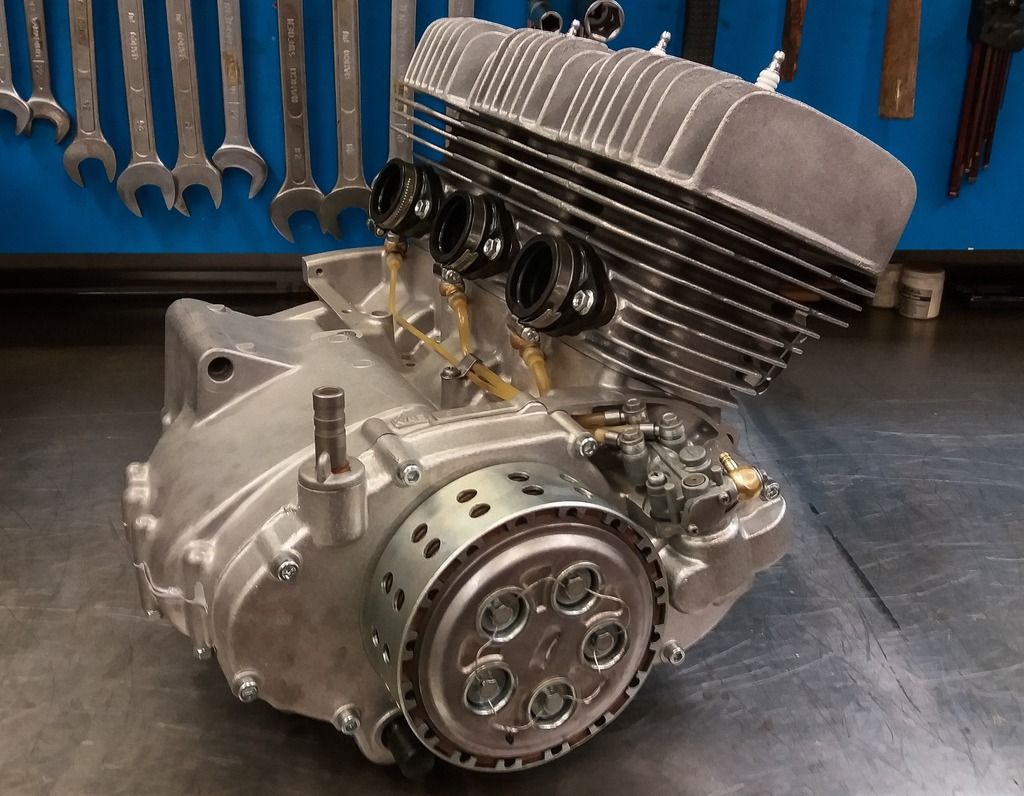 |
| Clutch side. And oil pump. |
Here´s the carb side. Ebbe managed to find intake rubbers that were possible to modify to fit the carbs AND the engine. I may have to change the studs to longer ones, but I´ll deal with that later. Or I might just find me some NOS intake rubbers and they are probably thinner.
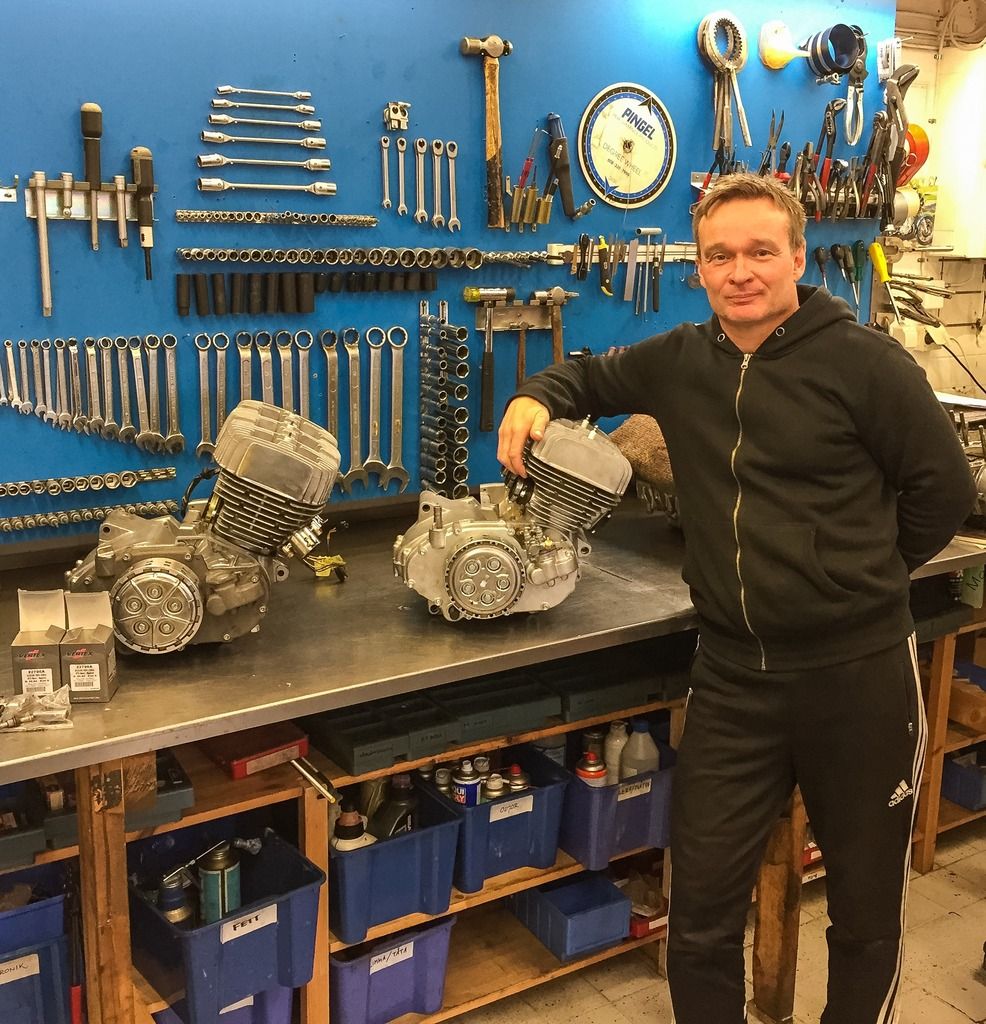 |
| The master and his work.... |
The man and his bench... He was very happy to deliver the engine and have it out of his shop. It´s nervous having the responsibility for such an iconic engine. I fully understand that! Note the H2 engine to the left... A customer engine awaiting attention. I like that dry clutch set-up!
 |
| I couldn´t be happier with Ebbe Parneståls work! |
So, for now, its goodbye EBOS/Eptune. I´ll be back later with other projects and bikes. That´s for sure!
Now that this hard part of the restoration is complete I feel inspired to move on. The next difficult task is restoring the inner fork legs. I have contacted two firms in Britain that both claim they can rebuild them to original specifications with new hard chrome and precision grinding to exact measurement. I will start dismantling the rest of the bike the coming days.
Just another trip to the US and then vacation....
Stay tuned!


Inga kommentarer:
Skicka en kommentar